
Can you plug an external microphone into a Sony camera? Short answer: Yes! But before you start singing your Oscar acceptance speech into that mic, let’s dive deeper.
Discover the magic of pristine audio and how it elevates your filmmaking game in this mic-dropping article!
Can You Plug an External Microphone into a Sony Camera?
Indeed, you can connect an external microphone to a Sony camera. The process is straightforward: simply insert the microphone’s 3.5mm audio cable into the camera’s microphone input jack.
Nevertheless, it’s crucial to recognize that not all Sony cameras support external microphones. Thus, before attempting to connect one, it’s wise to review your specific camera model’s specifications.
Furthermore, certain Sony cameras come equipped with XLR inputs, which are professional-grade audio connectors typically used with high-end microphones. If your camera boasts XLR inputs, you can effortlessly link a microphone sporting an XLR connector by using an XLR-to-3.5mm adapter or cable.
Understanding Sony Camera Ports
Sony cameras boast various ports catering to external device connections, including microphones. The most prevalent ports on Sony cameras encompass HDMI, USB, and the microphone jack.
HDMI Port: The HDMI port facilitates camera-to-external monitor or TV connections, greatly beneficial for previewing footage on a larger screen and live streaming.
USB Port: Sony cameras incorporate a USB port, enabling connections to computers and other USB-compatible devices. This proves handy for transferring footage to your computer or employing your camera as a webcam.
Microphone Jack: The microphone jack serves as a gateway for connecting an external microphone to your Sony camera. This proves indispensable when seeking to elevate the audio quality of your videos.
Types of External Microphones
A plethora of external microphones are available on the market, each with distinct advantages and drawbacks. Here’s a glimpse at some of the most prevalent types:
Shotgun Microphones: These directional microphones are adept at capturing sound from specific directions. Often perched atop cameras, shotgun microphones shine in recording dialogue and nearby sounds during video production.
Lavalier Microphones: Also known as lapel microphones, these compact devices can be affixed to clothing. Ideal for capturing dialogue and distant sounds, they’re frequently employed in interviews and scenarios where the subject is in motion.
Wireless Microphones: These microphones eliminate the need for physical connections to the camera, a boon for mobile subjects or recording audio from a distance. Comprising a transmitter and receiver, wireless microphones come in handheld and clip-on variants, catering to diverse recording requirements.
Compatibility of External Microphones with Sony Cameras
To enhance the audio quality of videos captured with Sony cameras, the option of connecting external microphones is available.
It’s crucial to note that not all Sony camera models support this feature, so it’s advisable to review the specifications of your specific camera before attempting any connections.
Certain Sony cameras are equipped with XLR inputs, which are professional-grade audio connectors commonly utilized with higher-end microphones.
If your camera boasts XLR inputs, you can establish a connection with a microphone featuring an XLR connector using either an XLR-to-3.5mm adapter or cable.
Sony Cameras’ Compatibility with Various Microphone Types
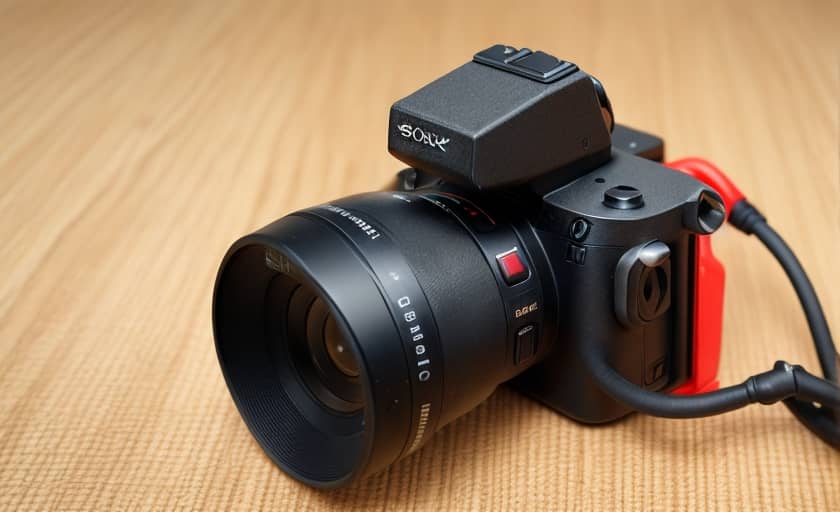
Among the array of microphones compatible with Sony cameras, the Sony ECM-B1M stands out as a favored choice.
This shotgun microphone conveniently attaches to the camera’s multi-interface shoe, eliminating the need for a cable connection to the mic jack. It offers a range of adjustable audio capabilities.
Additionally, the Sony XLR-K2M and XLR-K3M models offer the capacity to connect up to two XLR microphones via the multi-interface shoe and are bundled with the XM1 Super Cardioid Monorail microphone.
Key Considerations When Selecting a Microphone for Sony Cameras
When making a choice, it’s imperative to align the microphone’s specifications with the camera’s requirements.
Certain microphones come equipped with a Digital/Analog switch, where toggling to the Digital setting enables seamless communication between the microphone and the camera through the Multi-Interface Shoe.
Noteworthy models like the XLR-K2M, XLR-K3M, and ECM-B1M feature onboard audio adjustment settings for added customization.
Connecting an External Microphone to a Sony Camera
To establish a seamless connection between an external microphone and your Sony camera, it’s imperative to adhere to these steps:
Choosing the Right Cable/Adapter
Selecting the appropriate cable or adapter is the initial crucial step. Most external microphones employ a 3.5mm audio cable, which can be directly inserted into the camera’s microphone input jack.
However, some Sony cameras are equipped with XLR inputs, which are professional-grade connectors commonly used with higher-end microphones.
In the case of XLR inputs, employing an XLR-to-3.5mm adapter or cable becomes necessary to establish the connection with your microphone.
Locate the Microphone Jack on the Camera
fter acquiring the suitable cable or adapter, identifying the microphone jack on your camera is the subsequent step.
On the majority of Sony cameras, this jack is positioned on either the side or back of the camera body. It is typically denoted with a microphone icon or the word “MIC.”
Plug in the Microphone
With the cable or adapter in hand and the microphone jack located, proceed to plug in your external microphone. Simply insert the 3.5mm audio cable or XLR-to-3.5mm adapter into the designated microphone jack on your camera.
Ensuring a secure connection is vital to avoid any potential audio complications.
Adjust the Microphone Settings
Following the successful connection of your microphone, it becomes necessary to make adjustments to the microphone settings on your camera. The specific process may vary depending on your camera model.
You might need to access the audio settings menu to fine-tune parameters such as the microphone input level, activate phantom power for XLR microphones, or designate the microphone input source.
Considerations When Choosing a Cable/Adapter
When in the process of selecting a cable or adapter for your external microphone, take the following factors into account:
- Compatibility: Verify that the chosen cable or adapter is compatible with both your microphone and camera. Scrutinize the specifications of both to ensure they align with the same type of connector.
- Cable Length: Contemplate the required length of the cable. If your recording setup necessitates a longer reach, opt for a cable of sufficient length to bridge the gap to your microphone.
- XLR vs. 3.5mm: In the event that your camera features XLR inputs, incorporating an XLR-to-3.5mm adapter or cable is imperative for establishing the connection with your microphone. Keep in mind that XLR microphones tend to entail a higher cost compared to their 3.5mm counterparts, which is a consideration for your budgeting endeavors.
Adjusting Settings for External Microphone
To effectively employ an external microphone with your Sony camera, it’s crucial to configure specific settings to ensure seamless recognition and high-quality audio recording. Here’s a concise guide on the essential steps to achieve this:
Accessing Audio Settings on Sony Cameras
Begin by accessing the audio settings on your Sony camera. Although the exact procedure might vary depending on your camera model, generally, you can locate these settings within the camera’s menu system.
Look for a section labeled “Audio” or “Sound,” then navigate to the “Input” or “Microphone” sub-menu.
Adjusting Input Levels and Monitoring Audio
After entering the audio settings, you’ll need to fine-tune the input levels to ensure optimal microphone recording volume.
Most Sony cameras provide manual input level adjustment, either through a physical dial on the camera body or via a slider in the audio settings menu. It’s essential to set the input level so that the audio is clear and audible without distortion or clipping.
Troubleshooting Common Issues
Connecting an external microphone to your Sony camera is typically a straightforward process, but there are potential hurdles you might encounter along the way. Here, we address common issues and provide solutions:
1. No Audio Input Detected
- Ensure Proper Connection: The first step is to confirm that your microphone is securely plugged into the camera’s microphone input jack. Also, ensure the microphone is powered on if required.
- Adjust Audio Settings: If the connection is correct, but the camera doesn’t recognize the microphone, delve into the camera’s audio settings. Make sure the input source is set to “External Microphone” or “Mic Input” and adjust the input level as needed.
2. Background Noise or Interference
- Optimal Positioning: To minimize unwanted background noise or interference in your audio recordings, position the microphone as close to the sound source as possible and point it directly at the source. This helps reduce ambient noise pickup.
- Input Level Adjustment: Experiment with adjusting the input level to see if it helps reduce the noise. If necessary, consider using noise-reducing filters or post-production software to enhance audio quality.
Tips for Getting the Best Audio Quality
To attain the best audio quality when employing an external microphone in conjunction with your Sony camera, there are several key considerations to take into account. Here are some valuable tips:
Optimal Microphone Positioning
Positioning your microphone correctly is paramount for capturing top-notch audio. Ideally, you should place the microphone as close to the sound source as possible.
This strategic placement minimizes unwanted background noise, resulting in clear and crisp audio output.
Wind Noise Mitigation
In outdoor or windy recording environments, it’s advisable to employ a windshield or pop filter.
These accessories are instrumental in reducing wind noise, a common challenge when recording audio outdoors. By using a windshield or pop filter, you can effectively diminish this issue.
Microphone Level Adjustments
To ensure that your audio isn’t excessively loud or too quiet, it’s essential to adjust the microphone levels.
You can easily make these adjustments within the camera’s settings menu. Conducting a test recording is a prudent step to verify that the levels are appropriately configured.
Audio Monitoring with Headphones
When utilizing an external microphone for recording, it’s a wise practice to employ headphones for real-time audio monitoring. This enables you to precisely discern what the microphone is capturing.
Consequently, you can make on-the-fly adjustments to guarantee the utmost clarity and crispness in your audio recordings.
Frequently Asked Questions
Is it possible to attach a microphone to a Sony camera?
Certainly, you can link a microphone to a Sony camera. Most Sony cameras come equipped with a microphone input jack that facilitates the connection of an external microphone.
Does the Sony a7 feature a microphone input?
Yes, the Sony a7 is equipped with a microphone input. It features a 3.5mm microphone jack that enables you to connect an external microphone.
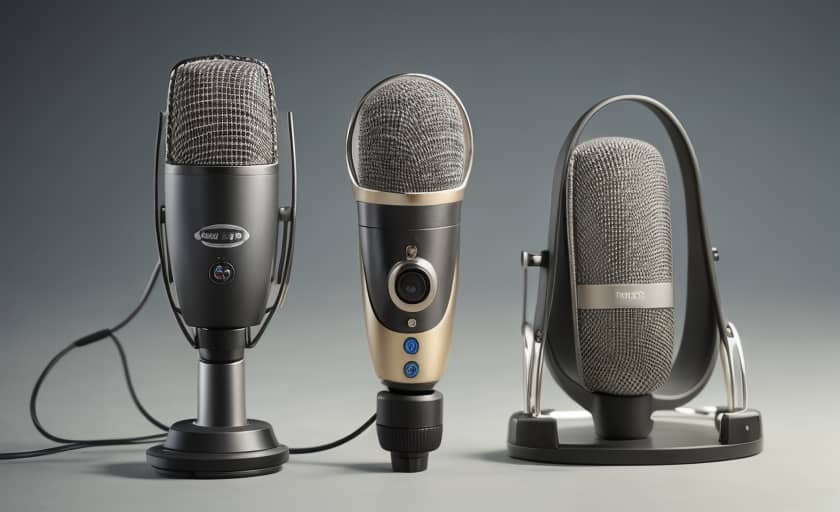
Can I plug my Blue Yeti into my camera?
Directly plugging a Blue Yeti microphone into a camera is not recommended.
The Blue Yeti is a USB microphone and requires a USB port for connection to a computer or other compatible devices. However, you can use an audio interface to connect the Blue Yeti to a camera.
Is an audio interface necessary for USB microphones?
USB microphones do not necessarily require an audio interface. They can be directly connected to a computer or another device with a USB port.
However, if you wish to connect a USB microphone to a camera or a device lacking a USB port, an audio interface will be needed.
Where should I plug in my USB microphone?
You can plug a USB microphone into a USB port on a computer or other compatible device. If you intend to connect a USB microphone to a camera or a device without a USB port, you will need an audio interface.
Does the Sony a7 have a headphone jack?
No, the Sony a7 does not include a headphone jack. However, certain models within the Sony a7 series, such as the Sony a7 III, do feature a headphone jack.
Is there a headphone jack in the Sony a7 II?
No, the Sony a7 II does not come with a headphone jack. Nevertheless, some models in the Sony a7 series, like the Sony a7 III, do incorporate a headphone jack.
Why can’t my camera detect my microphone?
Several factors may prevent your camera from recognizing your microphone. One common issue is an improper connection of the microphone to the camera. Ensure that the microphone is securely inserted into the microphone input jack on the camera.
Another possibility is that the microphone is incompatible with the camera. Refer to the camera’s manual to verify which types of microphones are compatible.
How do I set up an external microphone?
To set up an external microphone, start by confirming that the microphone is compatible with your camera.
Then, connect the microphone to the microphone input jack on the camera, ensuring a secure connection. Finally, adjust the camera’s audio settings to utilize the external microphone.
Is an external microphone necessary for a camera?
The necessity of an external microphone depends on your specific requirements. If you are recording audio in a noisy environment or require high-quality sound, an external microphone can enhance the audio quality of your recordings.
However, if you are recording in a quiet setting and do not require high-quality audio, your camera’s built-in microphone may suffice.
Can you use a Blue Yeti as a microphone?
Certainly, you can employ a Blue Yeti as a microphone. The Blue Yeti is a popular USB microphone suitable for recording audio on a computer or other compatible devices.
Does the Blue Yeti work with any USB?
The Blue Yeti necessitates a USB 2.0 or higher port for connection to a computer or other compatible device. It is compatible with most modern devices featuring a USB port.
What should I plug a Yeti microphone into?
The Blue Yeti is a USB microphone, and it requires a USB port to connect to a computer or another compatible device.
If you intend to connect the Blue Yeti to a camera or a device lacking a USB port, an audio interface will be necessary.
Final Thoughts
Enhancing the audio quality of your recordings with a Sony camera is a viable option through the addition of an external microphone.
The process itself is quite straightforward: simply insert the microphone’s 3.5mm audio cable into the designated microphone input jack on the camera.
For those seeking advanced options, Sony provides the XLR K2M and K3M models, which facilitate the connection of up to two XLR microphones via the multi-interface shoe.
These models even include the XM1 Super Cardioid Monorail microphone. It’s worth noting that certain Sony camera models, like the Sony DSC WX500, may not inherently support external microphones.
However, for these cases, there’s the option of utilizing an adapter to enable compatibility. This ensures a seamless audio enhancement experience with your Sony camera setup.