
Tired of your camera’s built-in microphone making you sound like a distant whisperer in your vlogs? Well, fear not, fellow creators, for we’re about to spill the beans on how to connect Coolpix P610 to external microphone! Ready for better audio and more engaging content? Let’s dive in!
Understanding the Coolpix P610’s Audio Input
Before we delve into the nitty-gritty of connecting an external microphone, let’s take a moment to understand the Coolpix P610’s audio input options.
This knowledge will help you make an informed decision about the type of microphone to use and how it can significantly enhance your audio recording experience.
The Coolpix P610 comes equipped with a built-in microphone, which is convenient for capturing audio on the go.
However, it has limitations in terms of audio quality and noise reduction, especially in noisy environments or windy conditions. External microphones offer a solution to these limitations, providing better sound quality and more control over your audio recordings.
Types of External Microphones Compatible with Coolpix P610
Now that you’re aware of the benefits of using an external microphone with your Coolpix P610, let’s explore the various types of external microphones that are compatible with this camera.
Each type has its own unique features and advantages, so understanding your options is essential for making the right choice.
1. Shotgun Microphones
Shotgun microphones, also known as directional microphones, are designed to pick up sound from a specific direction while minimizing ambient noise.
These microphones are ideal for capturing audio from a subject or source directly in front of the camera. They offer excellent audio quality and are a popular choice for video recording.
Pros:
- Highly directional, focusing on the intended sound source.
- Excellent for reducing background noise.
- Versatile for a wide range of recording scenarios.
Cons:
- May require a shock mount to minimize handling noise.
- Larger and less discreet compared to other microphone types.
2. Lavalier Microphones (Lapel Microphones)
Lavalier microphones are small, clip-on microphones that can be discreetly attached to clothing, making them a favorite for interviews, vlogs, and presentations.
They are omnidirectional, meaning they capture sound from all directions, making them suitable for capturing the speaker’s voice.
Pros:
- Discreet and easily hidden from the camera’s view.
- Ideal for interviews and on-camera presentations.
- Comes in both wired and wireless options.
Cons:
- May pick up background noise in noisy environments.
- Limited range of motion due to the microphone being clipped to clothing.
3. Handheld Microphones
Handheld microphones are a classic choice for audio recording, often used by reporters and presenters.
They offer a secure grip and allow the user to have full control over the microphone’s placement and direction. Handheld microphones are typically cardioid or dynamic microphones.
Pros:
- Easy to handle and control.
- Provides a sense of professionalism.
- Excellent for interviews and on-the-go reporting.
Cons:
- May not be the most discreet option for certain scenarios.
- Requires the subject to hold the microphone, limiting their mobility.
Now that you have an overview of the types of external microphones available, you can choose the one that best suits your needs and recording style.
Required Equipment
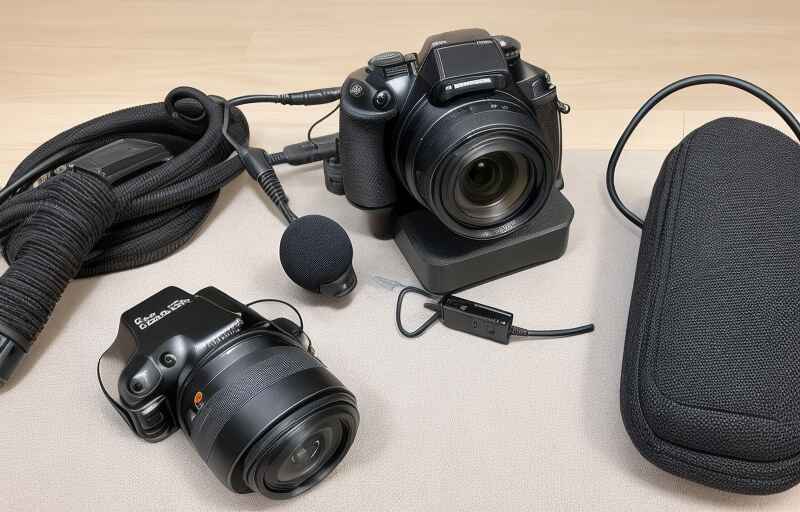
Before you embark on the journey of connecting an external microphone to your Coolpix P610, you’ll need to gather the necessary equipment and accessories.
Having the right tools at your disposal is essential to ensure a smooth and successful connection. Here’s a list of what you’ll need:
- External Microphone: Choose the type of microphone that aligns with your recording requirements, whether it’s a shotgun, lavalier, or handheld microphone.
- Microphone Adapter: The Coolpix P610 has a 3.5mm microphone input, so you’ll need an adapter if your microphone has a different connector. Ensure that the adapter is compatible with your camera.
- Audio Cable: A high-quality audio cable is essential for connecting the microphone to the camera. Make sure it’s the appropriate length for your setup.
- Optional Accessories: Depending on your recording environment, you may consider additional accessories such as a windscreen or shock mount to improve audio quality and reduce unwanted noise.
Now that you’ve gathered your equipment, let’s move on to the step-by-step guide on how to physically connect the external microphone to your Coolpix P610.
How To Connect Coolpix P610 To External Microphone
Step 1: Prepare Your Coolpix P610
Before you start, make sure your Coolpix P610 is powered off. This prevents any accidental audio interference during the setup process.
Step 2: Locate the Microphone Input
On the side of your Coolpix P610, you’ll find the microphone input port. It’s typically a 3.5mm jack labeled as “MIC.”
Step 3: Connect the Microphone Adapter
If your external microphone has a different connector than the 3.5mm jack on the camera, use the microphone adapter to ensure a proper connection.
Plug one end of the adapter into the microphone and the other end into the camera’s microphone input.
Step 4: Connect the Audio Cable
Next, take your audio cable and connect one end to the microphone and the other end to the microphone adapter or directly into the camera’s microphone input if no adapter is needed.
Step 5: Secure the Connection
Ensure that all connections are snug and secure. Loose connections can lead to audio issues or signal interruptions.
With these steps completed, your external microphone is now physically connected to your Coolpix P610.
However, there are a few additional settings you should configure to optimize your microphone’s performance.
Explore my articles for a more in-depth understanding of External Microphone use with Nikon camera:
Can An External Microphone Be Connected To A Nikon P900?
Can You Use An External Microphone With A D7000?
Setting Up the Microphone
To ensure that your external microphone works seamlessly with your Coolpix P610, you’ll need to make some adjustments in the camera’s settings.
- Access the Camera Menu: Power on your Coolpix P610 and access the camera menu.
- Select Audio Settings: Navigate to the audio settings within the menu. This is where you can customize your microphone settings.
- Microphone Type: Depending on the type of external microphone you’re using, select the appropriate microphone type in the settings menu. This ensures that the camera optimizes its audio recording for your specific microphone.
- Adjust Input Levels: You can typically adjust the microphone input level in the settings. Start with a moderate level and make adjustments based on your audio quality and the recording environment. Avoid setting it too high, as it can lead to distortion.
- Microphone Pattern (If Applicable): Some microphones offer different recording patterns, such as cardioid, omnidirectional, or stereo. Choose the pattern that best suits your recording needs.
- Test and Monitor: Before you start recording, conduct a test to ensure that the microphone is picking up sound correctly. Use headphones to monitor the audio quality while making any necessary adjustments to the microphone settings.
By following these steps, you can fine-tune your Coolpix P610’s settings to work seamlessly with your external microphone, ensuring top-notch audio quality for your recordings.
Testing the Microphone
Once you’ve connected your external microphone to your Coolpix P610, it’s essential to test it to ensure it’s working correctly with the camera. Follow these steps to perform a microphone test:
- Power On Your Camera: Turn on your Coolpix P610 and prepare it for recording.
- Connect Headphones: To monitor the audio, connect a pair of headphones to the camera’s headphone jack if available. This step is optional but highly recommended for troubleshooting.
- Record a Test Clip: Start recording a short test clip. Speak into the microphone, and make sure your voice is being picked up clearly. If you’re using headphones, listen to the audio quality as you record.
- Playback the Test Clip: Stop the recording and play back the test clip on your camera. Listen for any issues like distortion, background noise, or low volume.
- Troubleshooting Common Issues: If you encounter problems, here are some common issues and their solutions:
- Low Volume: Check the microphone input level in the camera settings and increase it if necessary.
- Distortion: Reduce the microphone input level if the audio is distorted.
- Background Noise: Try recording in a quieter environment, or consider using a windscreen or noise reduction software during post-processing.
By following these steps, you can ensure that your external microphone is working correctly with your Coolpix P610, and you’ll be ready to start recording high-quality audio.
Recording with an External Microphone
Now that you’ve confirmed your microphone is functioning correctly, let’s explore how to set the camera to use the external microphone for audio recording and understand the benefits of doing so.
To set the camera to use the external microphone:
- Access the Camera Menu: Turn on your Coolpix P610 and access the camera menu.
- Navigate to Audio Settings: Find the audio settings within the menu and locate the “Audio Input Source” or similar option.
- Select External Microphone: Choose the “External Microphone” option to instruct the camera to use the connected external microphone for audio input.
- Adjust Settings (Optional): Depending on your microphone type and preferences, you may need to make additional adjustments, such as microphone type, input level, or pattern. Refer to your microphone’s manual for specific guidance.
Benefits of Using an External Microphone
Recording audio with an external microphone offers several advantages:
- Improved Audio Quality: External microphones are designed to capture high-quality audio, resulting in clearer and more professional-sounding recordings.
- Reduced Background Noise: External microphones can help minimize unwanted background noise, ensuring that your recordings focus on your subject.
- Enhanced Control: You have greater control over audio settings, allowing you to fine-tune your recordings for different environments and scenarios.
By using an external microphone, you can significantly enhance the audio quality of your Coolpix P610 recordings, making them more engaging and polished.
Monitoring Audio
Monitoring audio levels while recording with an external microphone is crucial to ensure you capture the best possible sound. Here’s how to do it:
- Use Headphones: Connect a pair of headphones to your Coolpix P610’s headphone jack. This allows you to listen to the audio in real-time as you record.
- Adjust Input Levels: While monitoring with headphones, adjust the microphone input levels as needed. Aim for a balance where the audio is clear and free from distortion but still captures all the necessary sound.
- Watch for Clipping: Keep an eye on the audio levels displayed on the camera’s screen. If you see the levels consistently hitting the maximum (clipping), reduce the input level to prevent distortion.
Monitoring audio with headphones ensures that you can catch any issues during the recording process and make immediate adjustments for optimal audio quality.
Post-Recording Tips
After you’ve recorded with an external microphone on your Coolpix P610, there are post-processing steps you can take to further improve audio quality. Here are some tips:
- Use Editing Software: Transfer your recorded audio to a computer and use audio editing software like Audacity, Adobe Audition, or GarageBand for fine-tuning.
- Remove Background Noise: If you have background noise in your recordings, use noise reduction tools in your editing software to clean up the audio.
- Adjust Levels: Equalize and adjust the audio levels to ensure consistent sound throughout your recording.
- Apply Filters: Experiment with audio filters and effects to enhance the overall quality and achieve the desired sound.
- Sync with Video: If you’ve recorded audio separately, sync it with your video during the editing process for perfect audio-video alignment.
FAQs About How To Connect Coolpix P610 To External Microphone
How do I use an external microphone with my Nikon?
To use an external microphone with your Nikon camera, first, locate the microphone input port on the camera body.
Then, connect the microphone’s cable to this port. Ensure the microphone is securely attached and powered on.
How do I turn on my external microphone on my Canon camera?
To activate the external microphone on your Canon camera, access the camera’s menu settings.
Navigate to the audio or microphone settings section. Select the external microphone option and enable it. Make sure the microphone is properly connected.
How do I connect my external microphone to my camera?
Begin by identifying the microphone input port on your camera. Connect the microphone’s cable to this port securely.
Ensure the microphone is powered on and set to the correct mode (e.g., on, record, etc.) for it to function.
How do I enable my external microphone?
Access your camera’s menu settings and navigate to the audio or microphone options. Select the external microphone setting and enable it.
Ensure the microphone is properly connected and powered on for it to function.
Where do I plug in my external microphone?
Locate the microphone input port on your camera. This port is typically labeled with a microphone icon.
Connect the microphone’s cable to this port, ensuring a secure fit. Properly connecting the microphone is essential for it to work.
How do I allow my camera to access my microphone?
In your camera’s settings menu, find the audio or microphone options. Select the appropriate setting to allow access to the microphone.
Ensure the microphone is properly connected and powered on for it to be recognized by the camera.
Why can’t my camera access my microphone?
Check if the microphone is properly connected to the camera’s microphone input port. Ensure the microphone is powered on and set to the correct mode.
Additionally, verify that the camera’s audio settings are configured to recognize external microphones.
Why is my external microphone not working?
Ensure the microphone is securely connected to the camera’s microphone input port. Confirm that the microphone is powered on and set to the appropriate mode.
Double-check the camera’s audio settings to ensure it’s configured to use an external microphone.
If issues persist, try using a different microphone or consult the manufacturer’s guidelines.
Final Thoughts About How To Connect Coolpix P610 To External Microphone
In conclusion, mastering the art of connecting an external microphone to your Coolpix P610 can be a game-changer in your quest for high-quality audio recordings.
Understanding the microphone types, proper equipment, and camera settings is the first step.
Testing and monitoring your audio ensure a seamless recording process, while post-processing adds the finishing touch.
With a well-connected external microphone and attention to detail, your Coolpix P610 becomes a versatile tool for capturing not just exceptional visuals but also pristine audio.
Elevating your content quality and engaging your audience on a new level, this integration empowers you to unleash your creative potential.