
Ever tried singing your heart out on a Chromebook, only to realize the built-in mic sounds like you’re serenading from the bottom of a well? Fear not, troubadours of the web! Learn how to connect USB microphone to Chromebook and unleash your true vocal prowess. Ready for a harmonious revolution?
Why Choose a USB Microphone for Chromebook?
USB microphones have several advantages over built-in laptop microphones.
They offer improved audio quality and versatility, making them ideal for recording music, podcasts, or voice-overs.
USB microphones are also easy to use and don’t require any additional software or drivers.
They are plug-and-play devices that can be connected to your Chromebook via a USB cable.
Is Your USB Microphone Chromebook Compatible?
It’s important to choose a USB microphone that’s compatible with Chrome OS and doesn’t require any additional software or drivers.
Most USB microphones will work perfectly with your Chromebook, but some might not work at all.
To verify compatibility and avoid potential issues, you can check the manufacturer’s website or read reviews from other users who have successfully used the microphone with a Chromebook.
To get the latest scoop on USB MicrophoneX, don’t skip these featured articles from Best Quick Reviews: Do USB Microphones Work on Chromebooks? Comprehensive Guide
Understanding Your Chromebook’s USB Ports
Chromebooks have different USB ports, including USB-A and USB-C. USB-A ports are rectangular in shape and are more popular than USB-C ports.
However, some thinner Chromebooks only have USB-C ports.
If you want to connect a standard USB-A stem to a thinner Chromebook, you may need a USB-C to USB-A adapter.
To check what USB type is used in your Chromebook, you can:
- Take a look at the Chromebook from the left and the right side.
- Read the product description carefully to see whether the Chromebook has a USB-A or USB-C port.
How to Connect USB Microphone to Chromebook?
If you’re looking to connect a USB microphone to your Chromebook, you’re in the right place
Check Your USB Cable
Before you begin, it’s important to ensure that your USB cable is in good condition.
A damaged or frayed cable can cause connectivity issues and affect the performance of your microphone.
We recommend using a high-quality, compatible USB cable for optimal performance.
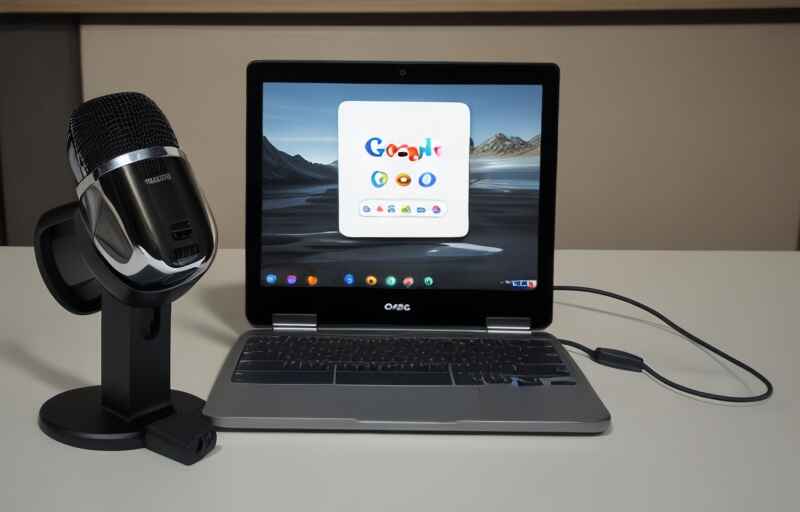
Plug in Your USB Microphone
Once you’ve confirmed that your USB cable is in good condition, it’s time to connect your USB microphone to your Chromebook. Follow these steps:
- Locate the USB port on your Chromebook. Depending on the model, it may be located on the side or the back of the device.
- Plug the USB cable into the USB port on your Chromebook.
- Connect the other end of the USB cable to your USB microphone.
If your USB microphone requires additional power, you may need to connect it to an external power source, such as a USB hub or a power adapter.
Chromebook Settings Adjustment
Now that your USB microphone is connected to your Chromebook, it’s time to adjust the settings to ensure optimal performance. Follow these steps:
- Click on the profile picture in the bottom right-hand corner of the screen.
- Click on the gear icon to open the settings menu.
- Click on the “Audio” tab.
- Under “Input,” select your USB microphone from the drop-down menu.
- Adjust the microphone volume slider to your desired level.
- Verify that your USB microphone is working by speaking into it and checking the audio levels.
If you’re experiencing issues with your USB microphone, there are a few troubleshooting steps you can try:
- Ensure that your USB microphone is selected as the default input device in the Chromebook settings.
- Check that your USB microphone is properly connected to your Chromebook and that the USB cable is in good condition.
- Restart your Chromebook and try connecting your USB microphone again.
- If you’re still experiencing issues, try connecting your USB microphone to a different USB port on your Chromebook.
By following these steps, you should be able to connect your USB microphone to your Chromebook and adjust the settings to ensure optimal performance.
Discover essential information about USB Microphone Levels On Chromebooks in my article: How To USB Microphone Levels On Chromebook? Mastering Audio
Testing Your USB Microphone on Chromebook
After connecting your USB microphone to your Chromebook, you should test it to make sure it’s working correctly. Here are the steps to follow:
Checking System Preferences
- Click on the clock in the bottom right-hand corner of the screen.
- Click on the gear icon to open the settings menu.
- Click on the “Sound” tab.
- Under “Input,” select your USB microphone from the drop-down menu.
- Adjust the microphone volume slider and verify that it’s working.
Test Recording
- Open the “Recorder” app on your Chromebook.
- Click on the “Record” button to start recording.
- Speak into your USB microphone.
- Click on the “Stop” button to stop recording.
- Click on the “Play” button to listen to your recording.
Tips for assessing and improving audio quality:
- Speak clearly and directly into the microphone.
- Make sure the microphone is not too close or too far from your mouth.
- Adjust the microphone volume to avoid distortion or clipping.
- Use a pop filter to reduce plosives and sibilance.
- Use a quiet room to avoid background noise.
Troubleshooting Common Issues
Unresponsive Microphone
If your Chromebook doesn’t detect the USB microphone, try the following solutions:
- Make sure the USB cable is securely connected to the Chromebook and the microphone.
- Try a different USB port on the Chromebook.
- Restart your Chromebook and try again.
- Check if your USB microphone is compatible with Chrome OS.
Poor Audio Quality
If you’re experiencing issues such as static, background noise, or low volume, try the following tips:
- Adjust the microphone volume and distance from your mouth.
- Use a pop filter to reduce plosives and sibilance.
- Use a quiet room to avoid background noise.
- Check if your microphone is muted or the wrong input is selected.
- Update your Chromebook’s operating system and audio drivers.
- Try a different USB microphone or use the 3.5mm headphone jack.
Advanced Tips for USB Microphone Users on Chromebook
Using External Apps
If you’re looking to record and edit audio on your Chromebook, there are several recommended applications that you can use. Some of the most popular ones include:
- Audacity: A free, open-source audio editor that’s available for Windows, Mac, and Linux. It’s easy to use and has a wide range of features, including recording, editing, and mixing audio.
- WavePad: A professional audio editor that’s available for Windows, Mac, and Android. It’s easy to use and has a wide range of features, including recording, editing, and mixing audio.
- Soundtrap: A cloud-based digital audio workstation that’s available for Windows, Mac, and Chromebooks. It’s easy to use and has a wide range of features, including recording, editing, and mixing audio.
In addition to these applications, you can also optimize your USB microphone’s performance with third-party tools. Some of the most popular ones include:
- Equalizer APO: A free, open-source equalizer that’s available for Windows. It allows you to adjust the sound of your USB microphone to your liking.
- Voicemeeter: A free, virtual audio mixer that’s available for Windows. It allows you to mix and route audio from different sources, including your USB microphone.
Adjusting Chromebook Sound Settings
Chromebook has a built-in sound settings menu that allows you to fine-tune sound settings for a personalized audio experience.
Here are some tips for maximizing the potential of your USB microphone:
- Adjust the input volume: If your USB microphone is too quiet or too loud, you can adjust the input volume in the sound settings menu.
- Turn on noise suppression: If you’re recording in a noisy environment, you can turn on noise suppression in the sound settings menu to reduce background noise.
- Turn on microphone boost: If your USB microphone is too quiet, you can turn on microphone boost in the sound settings menu to increase the volume.
Regular Maintenance and Care for Your USB Microphone
To ensure the longevity of your USB microphone, it’s important to clean and maintain it regularly. Here are some tips for cleaning and maintaining your USB microphone:
- Use a soft, dry cloth to wipe down the microphone: Avoid using water or cleaning solutions, as they can damage the microphone.
- Store the microphone in a dry, cool place: Avoid storing the microphone in a humid or hot environment, as this can damage the microphone.
- Avoid dropping or hitting the microphone: Dropping or hitting the microphone can damage the internal components and affect its performance.
Frequently Asked Questions
How do I enable my USB microphone?
To enable your USB microphone on a Chromebook, you need to log in to your Chromebook with your Google account information, connect the microphone to the Chromebook via the USB cable, and then select the microphone in the input section of the audio settings.
Why won’t my mic connect to my Chromebook?
If your microphone won’t connect to your Chromebook, try restarting your Chromebook, updating it, and checking the audio input settings.
You can also try disabling conflicting extensions on your Chromebook.
What microphones work with Chromebook?
Most microphones that come with a USB or a 3.5 mm jack can be easily plugged into a Chromebook.
There should be no drivers necessary for the microphone to work. Lapel lavaliere microphones use the 3.5mm jack and have been used for decades, while USB-A condenser microphones are gaining popularity as well.
Can you record audio on a Chromebook?
Yes, you can record audio on a Chromebook. You can use an external microphone on your Chromebook either through the 3.5mm headphone jack or the standard USB-A port. You can also use the program of your choice to record audio.
Why won’t my USB work on my Chromebook?
If your USB won’t work on your Chromebook, try restarting your Chromebook, checking the USB port for damage, and checking the USB device for damage.
You can also try connecting the USB device to a different port or using a different USB device.
Why isn’t my USB microphone working?
If your USB microphone isn’t working, try checking the audio input settings on your Chromebook, making sure the microphone is selected as the input device.
You can also try restarting your Chromebook, checking the USB port for damage, and checking the USB microphone for damage.
Do all Chromebooks have microphones?
Yes, all Chromebooks have built-in microphones.
However, the quality of the built-in microphone may vary depending on the model of the Chromebook.
How do I know if my USB microphone is working?
To know if your USB microphone is working, you can check the audio input settings on your Chromebook and make sure the microphone is selected as the input device.
You can also test the microphone by recording audio and playing it back.
How do I test my USB microphone?
To test your USB microphone, you can record audio and play it back to check the quality of the recording.
You can also check the audio input settings on your Chromebook and make sure the microphone is selected as the input device.
Why doesn’t Chromebook record audio?
If your Chromebook doesn’t record audio, try checking the audio input settings on your Chromebook and making sure the microphone is selected as the input device.
You can also try restarting your Chromebook, updating it, and checking for conflicting extensions.
How can I record myself on my Chromebook?
To record yourself on your Chromebook, you can use an external microphone on your Chromebook either through the 3.5mm headphone jack or the standard USB-A port.
You can also use the program of your choice to record audio.
Final Thoughts
To connect a USB microphone to a Chromebook, simply plug it into an available USB port. Chromebooks generally support plug-and-play functionality for USB devices, including microphones.
Once connected, access the Chromebook’s settings to choose the USB microphone as the input device. Ensure the microphone is recognized and selected in applications requiring audio input.
Connecting a USB microphone to a Chromebook is a straightforward process, enhancing audio capabilities for various activities such as video conferencing, recording, and more.