
Ever tried shouting battle strategies into your Xbox One headset, only to be met with radio silence? Fear not, fellow gamers! In this quick guide, we spill the beans on how to connect USB Microphone to Xbox One. Ready to turn up the volume on victory? Let’s dive in!”
Understanding USB Microphones
USB microphones are suitable for Xbox One because they are plug-and-play devices that do not require additional hardware or software to work.
They are also more convenient than traditional microphones because they are easy to set up and use.
USB microphones are ideal for gaming, podcasting, streaming, and other audio needs because they offer high-quality sound and noise cancellation features.
Benefits of Using USB Microphones Over Traditional Options
USB microphones offer several benefits over traditional microphones, including:
- Plug-and-play functionality
- No additional hardware or software required
- High-quality sound
- Noise cancellation features
- Easy to set up and use
Is Your USB Microphone Xbox One Compatible?
Before attempting to connect your USB microphone to Xbox One, you need to make sure that it is compatible with the Xbox One Stereo Headset Adapter.
Not all USB microphones are compatible with the adapter, so it is essential to check the compatibility before attempting to use it.
Here is a list of Xbox One-compatible USB microphones:
- Blue Yeti
- Blue Snowball
- Audio-Technica AT2020USB+
- Razer Seiren X
- Samson Meteor Mic
- HyperX QuadCast
- Elgato Wave:3
To check the compatibility of your existing USB microphone, you need to look for the specifications online or on the box.
If the specifications indicate that the microphone is compatible with Xbox One, then it should work with the Xbox One Stereo Headset Adapter.
What You Need Before Connecting
To connect a USB microphone to Xbox One, you need the following:
- Xbox One Stereo Headset Adapter
- USB microphone that is compatible with the adapter
- Xbox One controller with a 3.5mm audio jack
- Micro-USB cable
It is also essential to check for firmware updates on your Xbox One and USB microphones to ensure that they are up-to-date and working correctly.
How To Connect USB Microphone To Xbox One
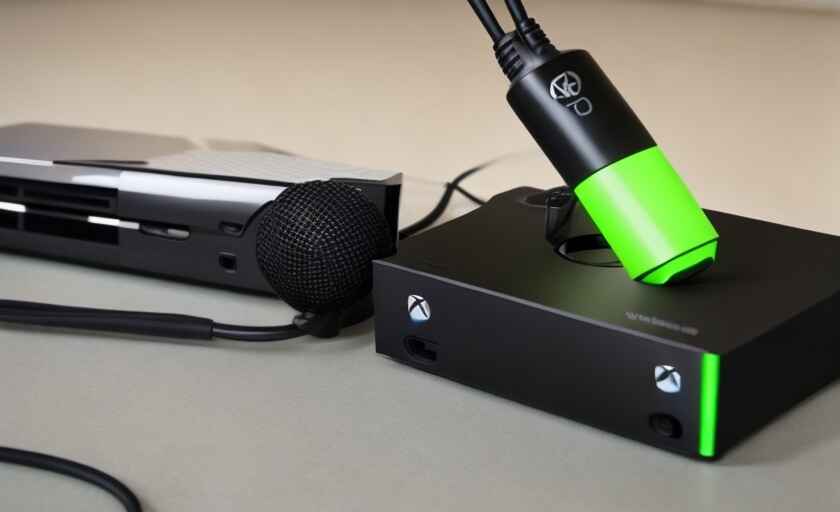
To connect a USB microphone to an Xbox One, you need to use an Xbox One Stereo Headset Adapter.
Any USB microphone that is compatible with the adapter will work on Xbox One. Here are the steps to follow:
- Plug the USB microphone into the USB port on your console.
- Connect the Xbox One Stereo Headset Adapter to the back of your Xbox One controller.
- Plug in the male end of the Headset Adapter Audio Splitter into the Xbox One Stereo Headset Adapter.
- Take the 3.5mm Auxiliary Audio Cable and connect it to the microphone end of the Headset Adapter Audio Splitter.
- Take the other end of the 3.5mm Auxiliary Audio Cable into your USB microphone’s 3.5mm headphone jack.
- Plug your headphones into the headphones end of the Headset Adapter Audio Splitter.
Troubleshooting Tips for Common Connection Issues
If you’re having trouble connecting your USB microphone to Xbox One, try these troubleshooting tips:
- Reconnect the Xbox mic. Sometimes disconnecting the mic or its associated headset and reconnecting it can fix audio problems that you experience.
- Make sure the microphone isn’t muted. Most gaming headsets have a mute button.
- Check the Xbox One Stereo Headset Adapter. Make sure it’s properly connected to the controller and the console.
- Ensure that your microphone is compatible with the adapter before attempting to use it.
Configuring Audio Settings on Xbox One
Once you have connected the USB microphone to the adapter, you can use it for gaming, podcasting, streaming, and other audio needs.
Here’s how to configure audio settings on Xbox One:
- Press the Xbox button with your headphones connected.
- Select the System tab.
- Choose Audio from the menu.
- Set the Headset chat mixer to your liking.
- To boost game audio, slide the bar to the left.
- To emphasize chat audio, move the bar to the right.
You can also adjust settings like volume level, mic monitoring, etc., by scrolling down further in the same Audio Devices window.
Testing Your USB Microphone on Xbox One
Before you start using your USB microphone on Xbox One, it’s important to test it to ensure that it’s working properly.
Here’s a step-by-step guide on how to test your USB microphone on Xbox One:
- Connect your USB microphone to your Xbox One using an Xbox One Stereo Headset Adapter. Make sure that your microphone is compatible with the adapter before attempting to use it.
- Go to “Settings” on your Xbox One and select “Kinect & Devices” > “Devices & Accessories” > “Select your microphone.”
- Select “Device Info” and check the audio levels to make sure that the microphone is picking up sound.
- Speak into the microphone to make sure that it’s working properly.
- Select “Volume and Test” to check the volume level of your microphone.
If you encounter any issues while testing your USB microphone, here are some troubleshooting tips:
- Make sure that your microphone is properly connected to your Xbox One.
- Check the audio settings on your Xbox One to make sure that your microphone is selected as the default audio device.
- Try using a different USB port on your Xbox One.
- Restart your Xbox One and try again.
Tips for Enhancing Audio Quality
Enhancing audio quality is essential when using a USB microphone on Xbox One. Here are some tips to help you get the best sound possible:
- Use a pop filter: A pop filter is a simple device that attaches to your microphone and helps to reduce popping sounds caused by plosive consonants like “p” and “b.” This can help to improve the clarity of your audio.
- Use a shock mount: A shock mount is a device that helps to isolate your microphone from vibrations and other unwanted noise. This can help to improve the overall quality of your audio.
- Use a windscreen: A windscreen is a foam cover that fits over your microphone and helps to reduce wind noise and other unwanted sounds. This can be especially useful if you’re recording outside or in a noisy environment.
Adjusting Microphone Placement for Optimal Sound Capture
Microphone placement is crucial when it comes to capturing high-quality audio. Here are some tips to help you get the best sound possible:
- Reduce the distance to the sound source: When it comes to microphone placement, you need to reduce the distance to a sound source. Close miking is placing microphones within 12 inches of the source. If you place the mic too close, there is the risk of distorting and muddying the captured sound. A microphone set up too far causes the source to sound weak or washed out.
- Consider the microphone’s footprint: An important consideration to contend with for microphone placement is the microphone’s footprint. A cardioid pattern is a suitable choice for all of the examples below. However, this works with several cardioid packaging options: mounted/handheld, lavalier, and shotgun. Interview… The setup considerations should consider whether the talent is standing or seated. This helps with breathing, projection, and comfort. Position the microphone about 12 inches from the source, try moving it within that distance, and adjust to taste. Make height adjustments around the talent’s position and based on whether they tilt their head at all when addressing the microphone.
- Experiment with microphone placement: Experimentation is necessary to find the optimal sound. Try different positions and distances to find the best placement for your microphone.
Utilizing Xbox One Audio Settings to Enhance Audio Quality
Xbox One offers a range of audio settings that can help to enhance the quality of your audio. Here are some tips to help you get the best sound possible:
- Use Windows Sonic for Headphones: Windows Sonic is a new way to experience audio, providing various improvements to both directional audio and general clarity. The technology is now available on Xbox One consoles and can provide a free-to-use solution, rather than the $15 license required to utilize Dolby Atmos through headphones.
- Adjust the EQ settings: You can adjust the EQ settings on your Xbox One to help enhance the quality of your audio. Experiment with different settings to find the best sound for your needs.
- Use the Xbox One Stereo Headset Adapter: The Xbox One Stereo Headset Adapter is essential for connecting a USB microphone to your Xbox One. Make sure your microphone is compatible with the adapter before attempting to use it.
Frequently Asked Questions
Do USB headsets work on Xbox?
USB headsets may not work on Xbox unless they are branded as “Made for Xbox One” because Microsoft requires a special communications chip to allow USB devices (headsets, mic, etc) to function on the Xbox One. This is different than on PC and PS4.
Why won’t my mic work on my Xbox one?
If your mic is not working on Xbox One, there could be several reasons. It could be due to a hardware issue, a software issue, or a problem with the Xbox One settings.
Some possible solutions include checking the mute button on your headset, updating your controller firmware, and checking your privacy settings.
Can I plug mic into Xbox?
Yes, you can plug a mic into Xbox One. You can use a 3.5mm jack or an Xbox stereo headset adapter to connect a supported wireless headset to your Xbox One console.
If you have an unsupported headset, you can use an Xbox One Stereo Adapter to connect it.
How do I use my USB mic and headset on Xbox?
To use a USB mic and headset on Xbox, you need to have one specifically designed for use with the console.
If you have a supported wireless headset, you can plug in the USB dongle of your headset into the console and press and release the connect button located on the side of your Xbox One console while the console is on.
If you have an unsupported headset, you can use an Xbox One Stereo Adapter to connect it.
Where is the USB port on Xbox One?
The USB port on Xbox One is located on the back of the console, near the HDMI port.
The Xbox One S and Xbox One X have two USB ports, one on the front and one on the back.
Where are mic settings on Xbox One?
To access mic settings on Xbox One, go to Settings > Display & sound > Volume > Party chat output.
From there, you can adjust the volume of your mic and other party chat settings.
Does Xbox have Bluetooth?
Yes, Xbox One has Bluetooth capabilities, but it is limited to certain devices such as Xbox Wireless Controllers, Xbox Adaptive Controllers, and some third-party accessories.
Xbox One does not support Bluetooth audio devices like headphones or speakers.
Why is my mic not working on Xbox game bar?
If your mic is not working on Xbox Game Bar, there could be several reasons.
Some possible solutions include checking your privacy settings, updating your audio drivers, and checking the mute button on your headset.
Can you connect Xbox via USB?
Yes, you can connect Xbox via USB. You can connect your Xbox One controller to your PC using a USB cable or the Xbox Wireless Adapter for Windows.
You can also connect your Xbox One console to your PC using the Xbox app for Windows 10.
Can I use a USB to HDMI on Xbox one?
No, you cannot use a USB to HDMI on Xbox One. Xbox One does not support USB to HDMI adapters.
Instead, you can connect your Xbox One to your TV using an HDMI cable.
Final Thoughts
To connect a USB microphone to your Xbox One, ensure it’s compatible and then insert it into any available USB port on the console.
Access “Settings,” navigate to “Devices & accessories,” and select the connected microphone.
Configure audio settings to prioritize the USB microphone. Keep in mind that not all USB microphones are supported, so check compatibility beforehand.
Enjoy improved audio quality and communication in your gaming experience with this simple setup.