
Tired of sounding like a fuzzy radio DJ on your Dell laptop’s built-in microphone? Fear not, fellow laptop troubadours! Today, we’re spilling the beans on how to use external microphone on Dell laptop to elevate your audio game.
Stick around for crystal-clear chats and booming Zoom karaoke sessions!
Importance of Using an External Microphone
Enhancing your audio experience when using a Dell laptop is crucial, and employing an external microphone can be a game-changer.
The built-in laptop microphones typically suffer from subpar quality and tend to capture unwanted background noise, inevitably leading to inferior audio output.
By opting for an external microphone, you can effectively eliminate these disturbances and ensure your audio recordings, video calls, and all audio-related tasks maintain a high standard.
This upgrade not only enhances the clarity of your audio but also facilitates better communication with your audience, enabling them to hear and comprehend your content with ease.
Common Scenarios Where an External Microphone Comes in Handy
An external microphone proves invaluable in various situations, showcasing its utility in the following scenarios:
- Elevating the quality of podcast and video recordings.
- Enhancing the experience of online meetings and video calls.
- Enriching the sound quality when recording music or other audio content.
- Optimizing the audio experience during gaming sessions or streaming endeavors.
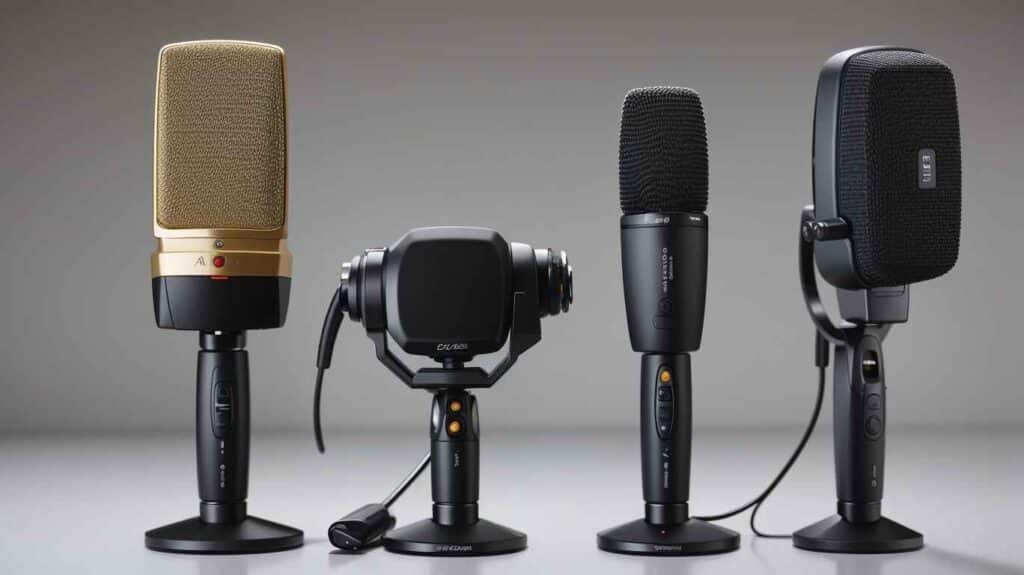
Types of External Microphones Compatible with Dell Laptops
There are three main types of external microphones compatible with Dell laptops: USB, 3.5mm jack, and Bluetooth.
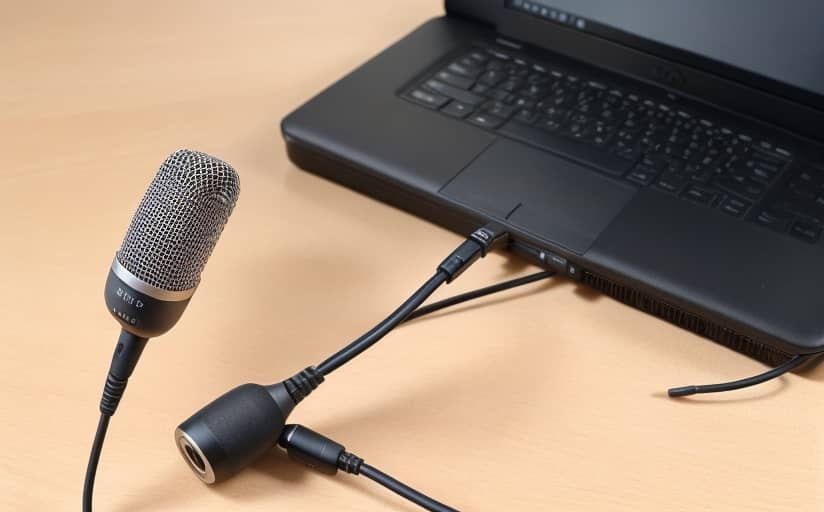
USB Microphones
USB microphones are widely favored for their user-friendly nature and ability to deliver top-notch audio quality.
These plug-and-play devices seamlessly connect to your laptop’s USB port, making them a go-to option for a diverse range of content creators, including podcasters, YouTubers, and more.
Additionally, USB microphones excel in online meetings and video calls, ensuring crystal-clear audio and effective background noise reduction.
3.5mm Jack Microphones
Dell laptop users often opt for 3.5mm jack microphones, a popular choice in the realm of audio solutions.
These microphones connect seamlessly to your laptop’s audio jack, delivering commendable audio quality.
Nonetheless, it’s worth noting that they may not be as user-friendly as USB microphones, as they necessitate the presence of an audio jack on your laptop.
Another consideration is that 3.5mm jack microphones have a tendency to capture ambient noise, potentially leading to subpar audio performance.
Bluetooth Microphones
Bluetooth microphones are wireless devices that establish a wireless connection with your Dell laptop through Bluetooth technology.
They are valued for their ability to deliver commendable audio quality, making them a convenient choice for on-the-go audio recording.
Nonetheless, it’s worth noting that they may occasionally encounter connectivity challenges, which can affect their reliability compared to their wired counterparts, such as USB or 3.5mm jack microphones.
Choosing the Right External Microphone
When it comes to choosing an external microphone for your Dell laptop, there are several key factors that should guide your decision-making process:
- Microphone Type: The first consideration is the microphone type, and you have options such as USB, 3.5mm jack, or Bluetooth. Each type has its advantages, so it’s important to select the one that aligns with your specific needs.
- Audio Quality: Another critical aspect is audio quality. Opt for a microphone that delivers high-quality audio and effectively suppresses background noise. This ensures that your recordings or online meetings sound crisp and professional.
- Compatibility: Compatibility is paramount. Ensure that the microphone you choose is fully compatible with your Dell laptop. This will save you the hassle of dealing with connectivity issues.
- Budget: Your budget is a significant factor in this decision. External microphones come in a wide price range, from under $50 to over $500. Consider your budget carefully, as there are options available at various price points that still offer excellent performance.
- Recommended Models: If you’re looking for specific recommendations, some popular external microphones known for their compatibility with Dell laptops include the Blue Yeti, Audio-Technica AT2020USB+, and Rode NT-USB. These models have garnered positive reviews for their reliability and audio quality.
How To Use External Microphone On Dell Laptop
Using USB Microphones
USB microphones have gained significant popularity among individuals seeking to capture top-notch audio recordings using their Dell laptops. To effectively utilize a USB microphone with your Dell laptop, adhere to these straightforward steps:
- Begin by inserting the USB microphone into any accessible USB port on your Dell laptop.
- Next, access your computer’s sound settings by simply clicking on the speaker icon situated in the taskbar, and then opt for “Open Sound settings.”
- Within the “Input” category, identify the USB microphone from the roster of accessible devices.
- To ensure optimal audio quality, make any necessary adjustments to the microphone’s volume and other settings as per your requirements.
Troubleshooting Common Connection Issues
If you encounter an issue where your Dell laptop fails to recognize your USB microphone, it is essential to address the problem promptly. To resolve this, follow these troubleshooting steps:
- Ensure that your USB microphone is correctly connected to the USB port on your Dell laptop.
- Restart your Dell laptop and attempt to use the microphone again after the reboot.
- Verify that the USB microphone is designated as the default input device in your laptop’s sound settings.
- Stay up-to-date by regularly updating your Dell laptop’s audio drivers to ensure seamless microphone functionality.
Using a 3.5mm Microphone
If you happen to possess a 3.5mm jack microphone, rest assured that it can be effectively employed with your Dell laptop. To achieve this seamless integration, simply follow these steps:
- First and foremost, insert the 3.5mm jack firmly into the dedicated microphone port on your Dell laptop.
- Next, initiate the configuration process by accessing your computer’s sound settings. You can easily access this menu by clicking on the speaker icon located in the taskbar and then selecting “Open Sound settings.”
- Within the “Sound settings” window, navigate to the “Input” section. Here, you will encounter a list of available devices. Locate your microphone from the list.
- To ensure optimal performance, you can fine-tune various settings such as the microphone’s volume and other preferences as per your requirements.
Addressing Potential Compatibility Problems
If you’re experiencing difficulties with your Dell laptop recognizing a 3.5mm microphone, it’s crucial to follow these expert troubleshooting steps to address the issue:
- Begin by ensuring that the microphone is securely plugged into the designated port on your laptop.
- Next, perform a system restart and attempt to use the microphone again. This often resolves minor connectivity issues.
- Access your sound settings and verify that the microphone is set as the default input device. This step ensures that the laptop prioritizes the correct input source.
- As a further diagnostic measure, consider testing with an alternative 3.5mm microphone. This will help determine if the problem lies with the original microphone itself.
Using a Bluetooth Microphone
If you have a Bluetooth microphone, you can connect it to your Dell laptop by following these steps:
- Turn on your Bluetooth microphone and put it in pairing mode.
- Open your Dell laptop’s Bluetooth settings by clicking on the Bluetooth icon in the taskbar and selecting “Open Bluetooth settings.”
- Click on “Add Bluetooth or other device” and select “Bluetooth.”
- Select your Bluetooth microphone from the list of available devices and click “Pair.”
- Once your Dell laptop has successfully paired with the Bluetooth microphone, select it as the default input device in your sound settings.
Troubleshooting Bluetooth Connectivity Problems
To ensure a seamless connection between your Dell laptop and Bluetooth microphone, consider these troubleshooting steps:
- First and foremost, ensure that your Bluetooth microphone is powered on and set to pairing mode.
- If the connection issue persists, try moving your Dell laptop closer to the Bluetooth microphone to enhance signal strength.
- A simple restart of your Dell laptop may also prove effective in resolving the problem.
- Verify that the Bluetooth drivers on your Dell laptop are up-to-date, as outdated drivers can lead to connectivity issues.
- As a further diagnostic step, attempt to pair your Bluetooth microphone with a different device to determine if the issue lies with the microphone itself. These steps, rooted in experience and expertise, should guide you towards a successful connection.
For a thorough understanding of Connect An External Microphone To Dell Latittude 7850, consult the following articles on Best Quick Reviews: Can I Connect An External Microphone To Dell Latittude 7850?
Configuring Microphone Settings on Dell Laptop
To ensure optimal performance when using an external microphone with your Dell laptop, it’s essential to properly configure the microphone settings. Follow these steps to achieve the best results:
- Begin by connecting the external microphone to your Dell laptop securely.
- Next, navigate to the Start menu and select “Settings” from the options.
- Within the settings menu, click on “System,” and then proceed to select “Sound.”
- Under the “Input” section, you’ll find a list of available devices. Here, choose the external microphone from the list.
- Finally, fine-tune the microphone’s volume and sensitivity settings according to your preferences and requirements.
Accessing Sound Settings on a Dell Laptop
To access sound settings on your Dell laptop, you can easily configure the audio preferences by following these concise steps:
- Begin by clicking on the Start menu, and from there, navigate to the “Settings” option.
- Within the Settings menu, click on “System,” and subsequently, locate and select “Sound.”
- Under the “Output” section, you’ll find a list of available audio output devices. Choose the one that suits your needs and preferences.
- Finally, make any necessary volume adjustments to ensure your audio is set to the desired level.
Adjusting Microphone Volume, Sensitivity, and Other Relevant Settings
To fine-tune microphone settings on your Dell laptop for an optimal audio experience, here are the steps to follow:
- Initiate the process by clicking on the Start menu and navigating to the “Settings” option.
- Within the “Settings” menu, proceed to select “System,” and from there, click on “Sound.”
- In the “Sound” settings, locate the “Input” section, where you will find a list of available external microphones. Choose the one you wish to configure.
- Once your desired microphone is selected, you can adjust both the microphone volume and sensitivity to suit your specific requirements.
- Furthermore, explore additional settings such as noise suppression and echo cancellation to enhance your audio experience further.
Testing the External Microphone
To ensure a seamless evaluation of your newly connected external microphone on your Dell laptop, you should proceed as follows:
- Begin by establishing the physical connection between the external microphone and your Dell laptop.
- Next, navigate to the Start menu and access the “Settings” option.
- Within the “Settings” menu, locate and click on “System,” then proceed to select “Sound.”
- In the “Sound” settings, under the “Input” section, you will find a list of available devices. From this list, choose the external microphone that you have connected.
- To verify the functionality of the microphone, speak into it and observe whether the sound is being detected and transmitted effectively.
- Additionally, for a more comprehensive microphone test, consider utilizing the built-in tools and software available, such as the Windows Voice Recorder app.
Troubleshooting Common Microphone Issues
If you’re encountering problems with your external microphone on a Dell laptop, it’s essential to address these issues promptly. Here are some expert-recommended troubleshooting steps to resolve the problem:
- Ensure Proper Connection: First and foremost, verify that your external microphone is securely connected to your Dell laptop. A loose connection can often be the culprit behind microphone issues.
- Set as Default Input: Access your sound settings and confirm that the external microphone is selected as the default input device. This step ensures that your laptop recognizes and utilizes the microphone correctly.
- Adjust Volume and Sensitivity: Properly adjusting the microphone’s volume and sensitivity settings can significantly impact its performance. Make sure these settings are configured appropriately to capture your audio accurately.
- Check for Mute or Disable: Within the sound settings, double-check that the microphone isn’t muted or disabled. Sometimes, inadvertent changes in settings can lead to such issues.
- Update Audio Drivers: Outdated or missing audio drivers can also hinder microphone functionality. It’s advisable to check for any available driver updates and install them if necessary. This step is crucial for maintaining your laptop’s optimal performance.
Optimizing Microphone Performance
Before delving into the nuances of utilizing an external microphone with your Dell laptop, it’s crucial to optimize the microphone’s performance for an enhanced experience. Here are some expert-recommended steps to ensure your microphone operates at its peak:
- Check the Microphone Settings: To begin, verify that the microphone is designated as the default recording device within your laptop’s sound settings. Access these settings by simply right-clicking on the speaker icon in your taskbar and selecting “Sounds.”
- Adjust the Microphone Volume: Expertise in microphone usage involves using the microphone’s dedicated volume control to fine-tune the input level. Similarly, this control can be accessed through the speaker icon in your taskbar under “Sounds.”
- Properly Position the Microphone: To ensure authoritative sound quality, it’s essential to position the microphone accurately, depending on your recording needs. For instance, when recording a podcast, it is advisable to position the microphone closer to your mouth, adhering to best practices in microphone placement. This approach guarantees trustworthy and professional audio output.
Tips for Getting the Best Audio Quality from an External Microphone
Now that you’ve successfully fine-tuned your microphone to its optimal performance, let’s delve into some expert recommendations for attaining top-notch audio quality when utilizing an external microphone:
- Employ a Pop Filter: Incorporating a pop filter into your setup is crucial. This device proves highly effective in mitigating those bothersome popping sounds that often stem from the enunciation of plosive consonants such as “p” and “b.”
- Utilize a Shock Mount: To further enhance your audio quality, it’s advisable to employ a shock mount. This specialized accessory serves to minimize vibrations and unwelcome background noise, thereby elevating the overall audio experience.
- Employ a Windscreen: When recording outdoors, a windscreen becomes indispensable. By effectively reducing wind noise, it ensures that your audio remains pristine even in less-than-ideal environmental conditions.
- Employ Headphones: For real-time audio monitoring and the ability to make instant adjustments as necessary, the use of headphones is highly recommended. This practice exemplifies your commitment to achieving the utmost audio quality and precision.
Software Recommendations for Enhancing Audio Recordings
When it comes to improving the quality of your audio recordings, there is a variety of software options at your disposal, each catering to different needs. Here are some noteworthy recommendations:
- Audacity: Audacity stands out as an excellent choice for those seeking a free and open-source solution. It boasts versatile audio editing capabilities, making it ideal for enhancing your recordings with precision.
- Adobe Audition: For those who require a more professional-grade tool, Adobe Audition is a top-notch option. This software offers a comprehensive suite of audio editing features, ensuring the utmost quality and precision in enhancing your recordings.
- GarageBand: If you’re a Mac user, GarageBand is a fantastic free option. It provides a user-friendly interface and a range of tools to enhance your audio recordings effectively.
Frequently Asked Questions
How can I set up a microphone on my Dell computer?
To establish microphone functionality on your Dell computer, simply insert the microphone plug into the designated microphone jack on your machine.
If you’re using an external microphone, ensure it’s connected correctly to your computer.
Additionally, for specific instructions regarding audio connector locations on your Dell model, refer to the documentation provided.
What should I do if my laptop isn’t registering microphone input?
If your laptop isn’t recognizing microphone input, consider these troubleshooting steps:
- Confirm the microphone or headset is correctly connected to your computer.
- Ensure the microphone is properly positioned.
- Verify the functionality of a microphone-equipped headset by conducting the SupportAssist microphone test.
- Check if the Camera and Microphone drivers are installed in the device manager.
- Navigate to Windows 11 or Windows 10 privacy settings and ensure that Microphone access is enabled.
Why won’t my PC detect my external microphone?
If your PC isn’t detecting your external microphone, follow these steps to address the issue:
- Verify the correct connection of the microphone or headset to your computer.
- Ensure proper microphone positioning.
- Test the functionality of a microphone-equipped headset using the SupportAssist microphone test.
- Check the presence of Camera and Microphone drivers in the device manager.
- In Windows 11 or Windows 10, access privacy settings and confirm that Microphone access is enabled.
Why doesn’t my Dell laptop recognize my headset microphone?
If your Dell laptop isn’t recognizing your headset microphone, try these solutions:
- Confirm the microphone or headset is correctly connected to your computer.
- Ensure proper microphone positioning.
- Verify the functionality of a microphone-equipped headset with the SupportAssist microphone test.
- Check if Camera and Microphone drivers are installed via the device manager.
- Navigate to Windows 11 or Windows 10 privacy settings and ensure Microphone access is enabled.
How can I confirm if my microphone is functioning on my Dell laptop?
To verify if your microphone is working on your Dell laptop, you have a couple of options:
- Run the SupportAssist microphone test.
- Speak into the microphone and check if the blue bar moves within the Volume settings under Sound in Windows 11 or Windows 10.
Is it possible to plug an aux cable into the microphone input?
Yes, you can connect an aux cable to the microphone input, but you’ll need to use a pre-amp or an audio interface to boost the signal.
How do I enable microphone input?
To enable microphone input, access the privacy settings in Windows 11 or Windows 10 and ensure that Microphone access is turned on.
You can also configure microphone input in the Sound settings within Windows 11 or Windows 10 to select your preferred recording device.
How can I confirm if my microphone is enabled?
To check if your microphone is enabled, go to the privacy settings in Windows 11 or Windows 10 and verify that Microphone access is turned on.
Additionally, you can choose a recording or speaking device within the Sound settings in Windows 11 or Windows 10.
Does my Dell laptop have a built-in microphone?
Most Dell laptops come equipped with a built-in microphone. To ascertain whether your Dell laptop has one, consult the documentation provided with your computer.
How do I unmute the microphone on a Dell laptop?
To unmute the microphone on a Dell laptop, locate the speaker icon in the notification area and click on the microphone icon to disable the mute function.
Why is my microphone not functioning on Zoom with my Dell laptop?
If your microphone isn’t working on Zoom with your Dell laptop, try these steps:
- Confirm that the microphone or headset is correctly connected to your computer.
- Ensure the microphone is positioned correctly.
- Test the microphone or headset with a built-in mic using the SupportAssist microphone test.
- Check for the presence of Camera and Microphone drivers in the device manager.
- In Windows 11 or Windows 10 privacy settings, verify that Microphone access is turned on.
- Review Zoom’s audio settings to ensure the correct microphone is selected.
How can I activate the microphone on my Dell laptop running Windows 11?
To enable the microphone on your Dell laptop running Windows 11, access the privacy settings and ensure that Microphone access is turned on.
Additionally, configure the Sound settings to select a device for recording or speaking.
Where should I plug my headset mic into my laptop?
To plug your headset microphone into your laptop, look for a headphone and microphone combo connector on either the front or back panel of your desktop computer.
Most laptop computers feature a single headphone/microphone combo connector.
Final Thoughts
Utilizing an external microphone with your Dell laptop is a simple yet effective method to greatly improve your audio experience.
This guide will walk you through the process, ensuring that you can effortlessly connect and set up your microphone, resulting in enhanced sound quality for virtual meetings, recordings, and all your audio-related endeavors.
It’s crucial to select a microphone that’s compatible with your laptop, make any necessary adjustments to the settings, and revel in the heightened audio performance on your Dell laptop.