
Ever accidentally turned your microphone into a makeshift water bottle during a lively karaoke session?
We’ve all been there! But fear not, we’ve got the ultimate quick fix for you. In this article, we’ll spill the beans on how to get water out of microphone – it’s a literal lifesaver for your tech gear! So, grab a towel and keep reading to rescue your mic from its aquatic adventure.
The Importance of Addressing Water Damage
Microphones are delicate electronic devices that rely on precision and sensitivity to capture sound accurately.
When water finds its way into a microphone, it can wreak havoc on its internal components.
The consequences of water damage may include distorted sound, reduced sensitivity, and in severe cases, permanent malfunction.
Leaving water inside a microphone can lead to corrosion, short-circuits, and the growth of mold or mildew.
These issues not only compromise the microphone’s performance but can also pose health risks to users.
Therefore, it’s crucial to take immediate action when you suspect water has infiltrated your microphone.
Potential Risks of Leaving Water Inside a Microphone
Before we dive into the steps for removing water from a microphone, let’s take a closer look at the potential risks associated with neglecting this issue:
1. Distorted Sound Quality
One of the most apparent consequences of water damage in a microphone is a significant drop in sound quality.
Users may notice distorted audio, pops, crackles, or an overall reduction in clarity.
This can be particularly problematic for musicians, podcasters, and content creators who rely on pristine audio recordings.
2. Reduced Sensitivity
Water can interfere with the microphone’s sensitive components, causing a reduction in sensitivity.
This means the microphone may struggle to pick up sound as effectively as it did before, requiring users to speak or sing closer to the microphone, which can be inconvenient and compromise the quality of recordings.
3. Electrical Malfunctions
Water is an excellent conductor of electricity, and when it enters the microphone’s circuitry, it can lead to short-circuits.
These electrical malfunctions can cause the microphone to stop working altogether or produce erratic behavior, making it unreliable for any application.
4. Mold and Mildew Growth
Moisture inside the microphone can create an ideal environment for mold and mildew growth.
These microorganisms can damage the microphone’s internal components and pose health risks to users when released into the air.
Now that we understand the potential risks, let’s move on to the practical steps for removing water from a microphone.
How To Get Water Out of Microphone
1. Identify the Water Damage
Signs of Water Damage
Before you can take action, it’s essential to identify whether your microphone has suffered water damage. Common signs include:
- Distorted Sound: If your microphone is producing distorted or muffled sound, it’s a clear indicator of water damage.
- Reduced Sensitivity: If you need to speak or sing closer to the microphone than usual, it may have reduced sensitivity due to water infiltration.
If you notice these signs, it’s crucial to act swiftly to prevent further damage.
2. Immediate Actions
Power Off and Disconnect
The first step when dealing with a water-damaged microphone is to power it off and disconnect it from any power source or audio equipment.
This action is vital to prevent any potential electrical damage and ensure your safety while handling electronic equipment.
When handling a wet microphone, it’s important to exercise caution and prioritize safety. Water and electricity don’t mix well, so taking these precautions is essential.
Remove External Water
After ensuring the microphone is powered off and disconnected, you can start by removing any external water.
Gently pat the microphone with a clean, dry cloth to soak up as much moisture as possible.
Avoid vigorous shaking, as this can push water deeper into the microphone and potentially cause more harm.
Continue patting the microphone until you no longer see moisture on its exterior.
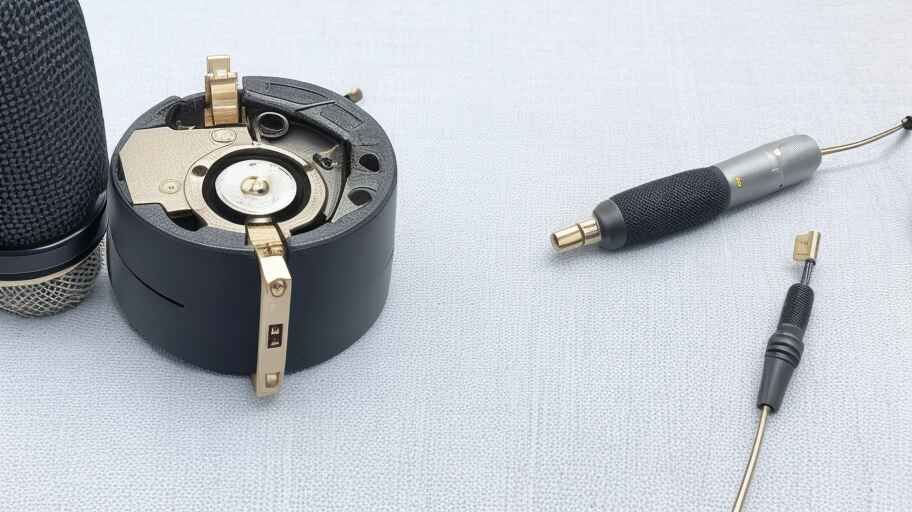
3. Disassemble the Microphone
Gather Necessary Tools
To effectively remove water from inside the microphone, you’ll need some tools and materials. These may include:
- Screwdrivers (various sizes)
- Cotton swabs
- A small brush
- A can of compressed air
- Isopropyl alcohol (90% or higher)
It’s essential to gather these tools and have them readily available before you start disassembling the microphone.
Additionally, ensure you’re working in a clean and well-lit workspace to prevent any further contamination.
Follow Manufacturer Instructions
While we provide general guidelines here, it’s essential to consult the manufacturer’s instructions for your specific microphone model.
Manufacturers often provide guidance on disassembly, cleaning, and maintenance, and following their recommendations can help you avoid causing unintentional damage during the process.
In case the manufacturer’s instructions are unavailable or unclear, you can proceed with the following steps:
- Carefully remove the microphone’s outer casing or housing. This may involve unscrewing screws or releasing clips, depending on the design.
- Once the casing is removed, you’ll gain access to the microphone’s internal components.
- Inspect the interior for any visible signs of moisture or water damage. Use a flashlight if necessary to get a better view.
- Gently dab any damp areas with a cotton swab or a clean, lint-free cloth. Avoid using excessive force, as delicate components may be present.
- Use compressed air to blow out any remaining moisture or debris. Hold the microphone components in a way that prevents any dislodged particles from falling back into the microphone.
- If you suspect that water has penetrated deeper into the microphone, you may need to disassemble it further to access the affected areas. This should be done with extreme caution, as it requires a higher level of expertise.
Remember, disassembling a microphone carries inherent risks, and if you’re not comfortable with this process or lack the necessary skills, it’s advisable to seek professional assistance.
Attempting to disassemble the microphone without adequate knowledge can lead to further damage.
Delve into my articles for an in-depth look at Clean a Microphone Capsule: How to Clean a Microphone Capsule? Sound Engineer’s Guide
4. Dry the Internal Components
After disassembling the microphone and addressing visible moisture, the next critical step is to thoroughly dry the internal components.
This is crucial to ensure that the microphone functions optimally and to prevent any residual moisture-related issues.
Air Drying
Benefits of Air Drying
Air drying is a highly effective method for removing moisture from the internal components of a microphone. It offers several advantages:
- Safe and Non-Invasive: Air drying is a gentle method that does not involve any harsh chemicals or excessive heat, making it safe for delicate electronic components.
- Cost-Effective: It doesn’t require any specialized equipment or materials, making it a cost-effective option.
- Uniform Drying: Air drying allows for uniform drying of all internal components, ensuring that no moisture is left behind.
Process of Air Drying
To air dry the microphone components:
- Ensure Proper Ventilation: Find a well-ventilated area where air can circulate freely.
- Arrange the Components: Lay out the disassembled microphone components in such a way that there is ample space between them. This promotes efficient airflow.
- Wait Patiently: Allow the components to air dry naturally. Depending on the level of moisture and humidity, this process may take several hours to a few days.
- Regularly Check for Dryness: Periodically check the components for signs of moisture. You can use a clean, dry cloth or tissue to gently pat the components and check for any moisture absorption. Continue air drying until all components are completely dry.
5. Use Desiccants
Introducing Desiccants
Desiccants are substances that are excellent at absorbing moisture from the surrounding environment.
They are an effective method for accelerating the drying process.
How to Use Silica Gel or Rice
Silica gel and rice are common desiccants that can be used to remove moisture from microphone components:
- Silica Gel:
- Place the disassembled microphone components in a container or bag.
- Add a generous amount of silica gel packets or loose silica gel beads to the container.
- Seal the container or bag to create a closed environment.
- Leave the components with the silica gel for at least 24 to 48 hours. Silica gel will gradually absorb the moisture from the components.
- Rice:
- Use a large container or bag and fill it with uncooked rice.
- Place the microphone components on top of the rice.
- Seal the container or bag and leave it for a minimum of 48 hours. Rice will absorb moisture from the components.
Remember to inspect the components periodically during this process to check for dryness. Once they are completely dry, you can proceed to the next steps.
6. Clean and Inspect
Cleaning the Components
Before reassembling the microphone, it’s essential to clean each component thoroughly. This ensures that no residue from the water or desiccants remains and that the microphone functions at its best.
Cleaning Steps:
- Diaphragms and Other Delicate Parts: Use a soft, lint-free cloth or cotton swabs lightly dampened with isopropyl alcohol (90% or higher) to gently clean delicate parts like diaphragms and circuit boards. Be very gentle to avoid damaging these sensitive components.
- Outer Housing: Clean the outer housing of the microphone using a slightly damp cloth. Ensure that no moisture seeps into the microphone’s interior during this process.
- Inspect for Residue: After cleaning, inspect each component carefully to ensure there is no visible residue or moisture.
Inspection for Residual Moisture
To ensure that the microphone is entirely dry and ready for reassembly, perform a thorough inspection:
- Visual Examination: Examine each component visually for any signs of moisture or residue. Look for water droplets, condensation, or discolored areas.
- Listen for Residual Moisture: Gently shake each component near your ear and listen for any signs of remaining moisture. You should not hear any sloshing or water-related sounds.
- Touch Test: Using a clean, dry cloth, gently touch each component and check for any residual moisture absorption. If the cloth remains dry, the component is likely fully dry.
Ensure that every component, both internal and external, is completely dry before moving on to the reassembly phase.
7. Reassemble and Test
Reassembling the Microphone
Now that you’ve successfully removed moisture and cleaned the components, it’s time to reassemble the microphone. Follow these steps carefully:
- Reference Your Disassembly: Consult any notes or reference images you took during the disassembly process to ensure you put the components back in the correct order.
- Follow the Reverse Order: Reverse the steps you followed during disassembly, starting with the last component you removed and working your way back to the outer casing.
- Use Caution: Handle each component with care, and be gentle during the reassembly process to avoid damaging any delicate parts.
Testing the Microphone
After reassembly, it’s essential to conduct a thorough functionality test to ensure the microphone is working correctly:
- Connect the Microphone: Reconnect the microphone to its power source and audio equipment.
- Perform Audio Test: Record or speak into the microphone and listen for any abnormalities in sound quality, such as distortion, crackling, or reduced sensitivity.
- Test Different Settings: If your microphone has adjustable settings, test each setting to ensure they all function correctly.
- Monitor for a While: Keep an eye (or ear) on the microphone’s performance for a period after reassembly to ensure there are no intermittent issues.
If the microphone passes all tests and performs as expected, you have successfully salvaged it from water damage.
8. Preventing Future Water Damage
Protective Measures
To avoid future water damage to your microphone, consider implementing protective measures:
- Microphone Covers: Invest in microphone covers or windshields that can protect the microphone’s sensitive components from moisture, especially when using it in outdoor or humid environments.
- Waterproof Storage: When not in use, store your microphone in a dry and safe environment, away from potential sources of moisture.
Proper Storage
Proper storage is crucial for maintaining your microphone’s longevity:
- Dry Environment: Store your microphone in a dry place with controlled humidity levels to prevent moisture-related issues.
- Protective Case: Consider using a dedicated protective case for your microphone when it’s not in use. Ensure the case is kept in a dry and secure location.
By following these preventive measures, you can significantly reduce the risk of water damage to your microphone and enjoy consistent, high-quality performance.
FAQs About How To Get Water Out of Microphone
How do I get water out of my phone microphone?
To remove water from your phone microphone, start by powering off the device immediately.
Use a can of compressed air or a vacuum cleaner with a small nozzle to gently blow or suck out the moisture. Be patient and thorough to ensure all water droplets are removed.
How do I get water out of my iPhone 12 microphone?
For an iPhone 12, the process is similar. Turn off the device, then use compressed air or a vacuum nozzle to carefully remove the water from the microphone.
Avoid using excessive force, and be patient to prevent further damage.
Can water get into iPhone microphone?
Yes, water can enter an iPhone’s microphone if it is exposed to moisture or submerged.
This can affect the microphone’s performance and audio quality. Immediate action is essential to prevent damage.
How do you fix a water-damaged headphone mic?
To repair a water-damaged headphone microphone, disconnect it from any device and let it air-dry for at least 48 hours.
Avoid using heat sources, as they can damage the mic further. If the issue persists, consider professional repair or replacement.
What happens if water gets in your microphone?
When water enters a microphone, it can distort or muffle audio quality. In some cases, it may lead to complete malfunction.
Promptly removing the water and allowing the microphone to dry is crucial to avoid permanent damage.
What happens if you put a microphone in water?
Submerging a microphone in water can lead to severe damage or complete failure.
Water can corrode internal components and disrupt the microphone’s delicate diaphragm. It should be avoided at all costs.
How do I eject liquid from my iPhone?
To eject liquid from your iPhone, turn it off immediately, then gently shake it with the ports facing downward to encourage liquid drainage.
Avoid vigorous shaking, as it may cause further damage. Follow up with the drying process.
How do I push water out of my iPhone?
To push water out of your iPhone, use a can of compressed air to blow air into the device’s ports and openings.
This can help dislodge trapped moisture. Ensure the iPhone is powered off and be gentle during this process.
Where is Water Eject on iPhone?
iPhones do not have a specific “Water Eject” feature. To remove water from an iPhone, follow the steps mentioned above, such as turning it off, shaking gently, and using compressed air.
There is no dedicated button or function for water ejection.
Will my phone dry out on its own?
In some cases, a phone may dry out on its own if it’s turned off and left in a dry environment for an extended period.
However, it’s essential to take proactive steps to remove moisture and prevent potential damage, as waiting for natural drying is risky.
Final Thoughts About How To Get Water Out of Microphone
In conclusion, rescuing a water-damaged microphone demands both diligence and care.
Water intrusion poses severe risks to the microphone’s performance and longevity, but prompt and meticulous action can often save the day.
From identifying the damage to thorough drying and reassembly, each step is vital.
Regular maintenance and protective measures are equally crucial to prevent future water-related mishaps.
By adhering to the guidelines outlined in this comprehensive guide, users can safeguard their microphones and ensure they continue to deliver pristine sound quality.
Remember, when it comes to microphone care, prevention and swift action are the keys to preserving your valuable equipment.