
How to Plug a Condenser Microphone into Computer? It’s like teaching your grandma to text – sounds complicated, but trust us, it’s a piece of cake!
Whether you’re a podcast pro or just upgrading your Zoom game, we’ve got you covered. Stay tuned for the mic drop of knowledge!
Types of Condenser Microphones
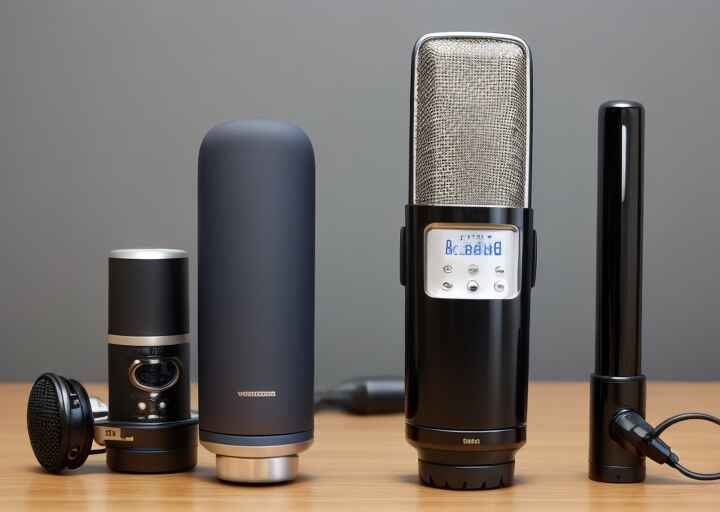
Before we dive into the connection process, it’s essential to understand the different types of condenser microphones available.
There are two main types of condenser microphones: large-diaphragm and small-diaphragm. Large-diaphragm microphones are ideal for recording vocals and instruments, while small-diaphragm microphones are better suited for recording acoustic instruments and high-frequency sounds.
The type of microphone you choose will affect the connection process. Large-diaphragm microphones typically require phantom power, which is a power source that provides the microphone with the necessary voltage to operate.
Small-diaphragm microphones, on the other hand, may or may not require phantom power, depending on the model.
Equipment You Need
To connect a condenser microphone to your computer, you’ll need the following equipment:
Microphone
The first piece of equipment you’ll need is a condenser microphone. When choosing a microphone, look for the following features:
- Polar pattern: This refers to the directionality of the microphone. Cardioid microphones are ideal for recording vocals and instruments, while omnidirectional microphones are better suited for recording ambient sounds.
- Frequency response: This refers to the range of frequencies that the microphone can pick up. Look for a microphone with a flat frequency response, which means that it can capture a wide range of frequencies accurately.
- Sensitivity: This refers to the microphone’s ability to pick up sound. Look for a microphone with a high sensitivity rating, which means that it can capture even the quietest sounds.
Cables
The second piece of equipment you’ll need is a cable to connect the microphone to the audio interface. There are two types of cables you can use: XLR and USB.
XLR cables are the most common and are used to connect professional microphones to audio interfaces. USB cables, on the other hand, are used to connect USB microphones directly to your computer.
When choosing an XLR cable, look for the following specifications:
- Length: Choose a cable that is long enough to reach from your microphone to your audio interface.
- Shielding: Look for a cable with good shielding to prevent interference from other electronic devices.
- Connectors: Choose a cable with high-quality connectors to ensure a reliable connection.
Audio Interface
The third piece of equipment you’ll need is an audio interface. An audio interface is a device that converts analog audio signals into digital signals that your computer can understand.
It also provides phantom power to your microphone, which is essential for large-diaphragm microphones.
When choosing an audio interface, look for the following features:
- Phantom power: Make sure the audio interface provides phantom power to your microphone if you’re using a large-diaphragm microphone.
- Number of inputs: Choose an audio interface with enough inputs to accommodate all of your microphones and instruments.
- Sample rate: Look for an audio interface with a high sample rate, which means that it can capture more detail in your recordings.
- Compatibility: Make sure the audio interface is compatible with your computer’s operating system.
Setting Up Your Computer
Before plugging in your condenser microphone, you need to configure your computer for microphone use. Follow these steps:
- Connect your microphone to your computer using a USB cable.
- Open your computer’s audio settings. On Windows, right-click the speaker icon in the taskbar and select “Sounds.” On macOS, go to “System Preferences” and select “Sound.”
- In the audio settings, select your microphone as the default recording device.
- Adjust the input volume as needed.
Adjusting Audio Settings
To ensure optimal audio quality, you may need to adjust your computer’s audio settings. Follow these steps:
Windows
- Right-click the speaker icon in the taskbar and select “Sounds.”
- Click the “Recording” tab.
- Select your microphone and click “Properties.”
- In the “Levels” tab, adjust the microphone volume as needed.
- In the “Enhancements” tab, select “Disable all enhancements.”
macOS
- Go to “System Preferences” and select “Sound.”
- Click the “Input” tab.
- Select your microphone and adjust the input volume as needed.
Installing Drivers
Some condenser microphones require drivers to function properly. Follow these steps to install necessary drivers:
- Check the manufacturer’s website for driver downloads.
- Download and install the appropriate driver for your microphone.
- Restart your computer.
How to Plug a Condenser Microphone into a Computer?
A condenser microphone is a type of microphone that uses an electrically charged capacitor to capture sound. It is a great way to improve the sound quality of your recordings, whether you’re doing audio for video or just recording music.
Connecting a Condenser Microphone to a Computer
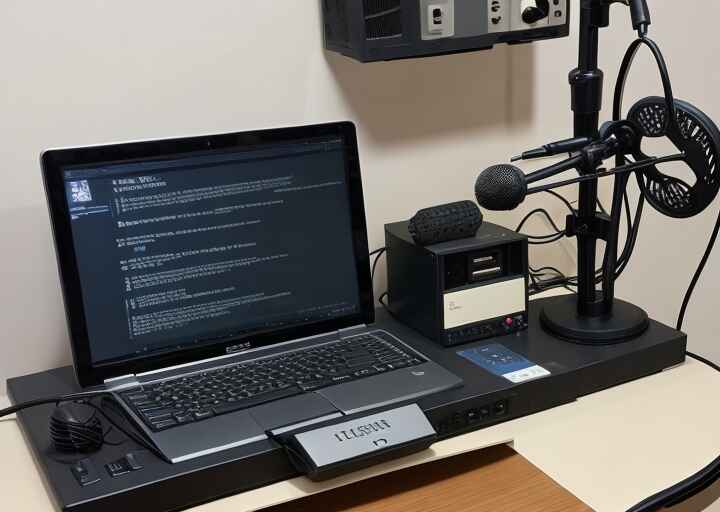
To connect a condenser microphone to a computer, you will need an audio interface that has phantom power.
Phantom power is a DC voltage that is sent through the microphone cable to power the condenser microphone. Here are the steps to connect a condenser microphone to a computer:
- Connect the USB to USB-C adapter to your computer.
- Use the Thunderbolt to USB cable that the audio interface comes with to connect it to the USB to USB-C adapter.
- Connect an XLR cable from the audio interface into your condenser microphone.
- Turn on the phantom power button on the audio interface.
- Use a pop filter and shock mount to reduce unwanted noise.
- Open the sound settings on your computer.
- Select “Sound,” and then go into the Input section.
- Select the option, “Focusrite Scarlett 2i2,” or whatever audio interface it is that you’re using.
Discover essential information about Condenser Microphone in my article:
How To Connect MXL 990 Condenser Microphone To Computer?
How To Get Condenser Microphone To Work With FL Studio?
How To Use MXL 990 Condenser Microphone on a PC
Alternatives for Connecting a Condenser Microphone to a Computer
If you don’t want to use an audio interface, you could use a USB condenser microphone like the Audio Technica AT2020USBPLUS. However, keep in mind that USB microphones have limitations in terms of sound quality and flexibility.
Testing Your Setup
Before you start recording, it’s important to test your newly connected condenser microphone to ensure it’s working properly. Here’s how to test your setup:
- Open your computer’s sound settings.
- Select “Sound,” and then go into the Input section.
- Select the option for your audio interface.
- Speak into your microphone and check the input levels to ensure they’re registering properly.
If you’re not getting any sound or the input levels are too low, there may be an issue with your setup.
Troubleshooting
Here are some common issues that may arise during testing and how to resolve them:
- No sound: If you’re not getting any sound, check to make sure your microphone is properly connected and that the phantom power button is turned on.
- Low input levels: If the input levels are too low, try adjusting the gain on your audio interface or moving closer to the microphone.
- Background noise: If you’re hearing unwanted background noise, try using a pop filter or shock mount to reduce it.
Recording and Adjusting Settings
Once you’ve tested your setup and everything is working properly, it’s time to start recording. Here are some tips on recording with your condenser microphone and adjusting audio settings:
Recording Software
To record with your condenser microphone, you’ll need recording software. Here are some popular recording software options and how to set them up with your microphone:
- Garageband: Garageband is a free recording software for Mac users. To set it up with your microphone, open Garageband and create a new project. Select “Audio” as the project type and choose your audio interface as the input device. You should now be able to record with your condenser microphone.
- Audacity: Audacity is a free recording software for Windows and Mac users. To set it up with your microphone, open Audacity and go to “Edit” > “Preferences” > “Devices.” Select your audio interface as the recording device and click “OK.” You should now be able to record with your condenser microphone.
Adjusting Audio Settings
To ensure you’re getting the best sound quality possible, you’ll need to adjust your audio settings. Here are some key settings to adjust:
- Microphone gain: The microphone gain is the amount of signal amplification applied. If it’s too low, the signal will be weak and add noise. If the gain is too high, there will be signal distortion. Adjust the gain until you get a clear, strong signal.
- Input levels: The input levels should be set so that they’re not too low or too high. Adjust the input levels until they’re registering properly.
- Noise reduction: If you’re hearing unwanted background noise, try using noise reduction software to remove it.
To satisfy your curiosity about Condenser Microphone , delve into my article entitled
What Is A Condenser Microphone And How Does It Work?
How To Setup ZaxSound Condenser Microphone?
Maintenance and Best Practices
To ensure optimal performance of your condenser microphone setup, it is important to follow these best practices:
- Store your microphone in a dry, cool place when not in use.
- Use a windscreen or pop filter to reduce plosives and wind noise.
- Use a shock mount to reduce handling noise.
- Clean your microphone regularly with a soft, dry cloth.
- Avoid exposing your microphone to extreme temperatures or humidity.
- Use a high-quality XLR cable to connect your microphone to the audio interface.
By following these best practices, you can ensure that your condenser microphone setup is in top condition and delivers high-quality sound.
Frequently Asked Questions
How do I connect my XLR condenser mic to my computer?
The best way to connect an XLR microphone to a computer is to use an audio interface.
This device takes the analog XLR signal from the microphone and converts it to a digital signal that can be used by your computer.
You can also use an XLR-to-USB signal adapter or a USB to XLR microphone cable converter, but these methods work only with dynamic microphones.
Do you need an audio interface for a condenser microphone?
Yes, you need an audio interface for a condenser microphone. This device takes the analog XLR signal from the microphone and converts it to a digital signal that can be used by your computer.
You can also use an XLR-to-USB signal adapter or a USB to XLR microphone cable converter, but these methods work only with dynamic microphones.
Can I connect a condenser mic directly to a speaker?
No, you cannot connect a condenser mic directly to a speaker.
A condenser microphone requires an audio interface or a mixer to amplify the signal and convert it to a format that can be used by a speaker.
Do condenser mics need a power source?
Yes, condenser mics need a power source. They require phantom power, which is a DC voltage that is supplied by an audio interface or a mixer.
This power is necessary to charge the diaphragm of the microphone and to amplify the signal.
Do you need a power supply for a condenser mic?
No, you do not need a power supply for a condenser mic. Instead, you need phantom power, which is a DC voltage that is supplied by an audio interface or a mixer.
This power is necessary to charge the diaphragm of the microphone and to amplify the signal.
Does a condenser mic need power?
Yes, a condenser mic needs power. It requires phantom power, which is a DC voltage that is supplied by an audio interface or a mixer.
This power is necessary to charge the diaphragm of the microphone and to amplify the signal.
What port do I plug my mic into PC?
You can plug your mic into the microphone port on your PC. This port is usually located on the back of the computer and is marked with a microphone icon.
If your computer does not have a dedicated microphone port, you can use a USB audio interface to connect your microphone.
Why does my mic not work when I plug it into my PC?
There could be several reasons why your mic is not working when you plug it into your PC.
Some possible causes include a faulty cable, a damaged microphone, incorrect audio settings, or outdated drivers.
You can troubleshoot the issue by checking your audio settings, testing the microphone on another device, or updating your drivers.
Why does my mic not work on my PC?
There could be several reasons why your mic is not working on your PC. Some possible causes include a faulty cable, a damaged microphone, incorrect audio settings, or outdated drivers.
You can troubleshoot the issue by checking your audio settings, testing the microphone on another device, or updating your drivers.
What do you need for a condenser mic?
To use a condenser mic, you need an audio interface or a mixer that provides phantom power, an XLR cable to connect the microphone to the interface or mixer, and a stand or mount to hold the microphone in place.
You may also need a pop filter or windscreen to reduce unwanted noise.
Does XLR to USB work with condenser microphone?
Yes, XLR to USB can work with a condenser microphone, but you need an XLR-to-USB signal adapter.
This device takes the analog XLR signal from the microphone and converts it to a digital signal that can be used by your computer.
However, an audio interface is a better option for connecting a condenser microphone to your computer because it provides better sound quality and more control over the recording process.
Final Thoughts
Plugging a condenser microphone into a computer is a simple yet pivotal process for quality audio recording.
Properly connecting these two devices enhances the clarity and precision of sound capture.
The condenser microphone’s sensitivity makes it an excellent choice for various recording purposes, from podcasting to music production.
Remember to use the right cables and adapters, and ensure a stable power source for optimal performance. Mastering this connection opens the door to endless creative possibilities in the world of digital audio.