
How to Set Up a ZaxSound Condenser Microphone? It’s not rocket science, but it might just make you sound like a rock star!
From unraveling cables to finding that perfect angle, we’ve got your audio adventures covered. Stay tuned for sound advice!
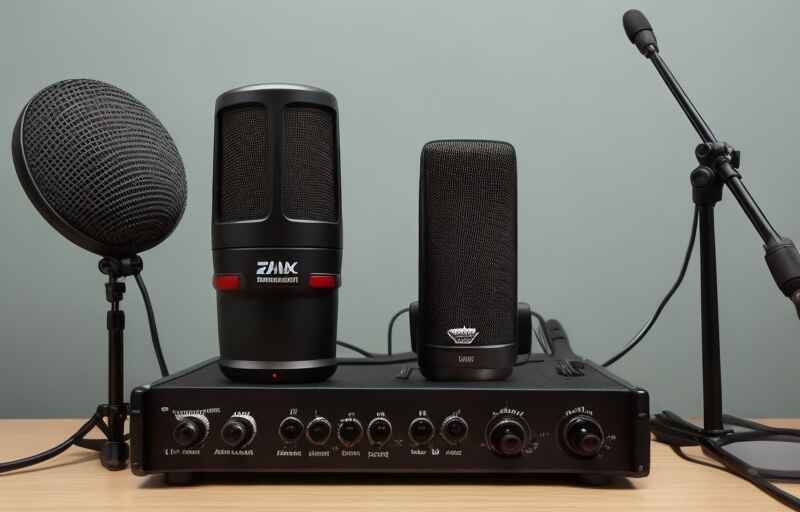
Unboxing and Initial Inspection
Once you get your hands on the ZaxSound Condenser Microphone, you’ll come across these components in the box:
- The ZaxSound Condenser Microphone (of course!)
- Shock Mount
- Pop Filter
- Your connection lifeline: 3.5mm to XLR Cable
- Foam Windscreen
Heads up! Do a thorough once-over for any damage on the microphone and its accessories. Notice anything peculiar? Reach out to the seller pronto!
For more information on Condenser Microphone, check out the following Best Quick Reviews articles:
What Is A Condenser Microphone And How Does It Work?
How To Setup ZaxSound Condenser Microphone
Setting up your shiny ZaxSound condenser microphone might seem tricky at first, but no worries! It’s a straightforward game with a few key steps.
How to Choose the Right Cable for Your Setup
Before the real action begins, pick the appropriate cable for your setup. The superstar connecting a condenser microphone?
The XLR cable, my friend. It provides you with a crisp, noise-free signal. Just be sure it’s long enough to get from your microphone to your sound interface or mixer.
Step-by-Step Guide to Connecting the Microphone to Your Device
Got the right cable? Awesome! Now, it’s time to join the ZaxSound condenser microphone and your sound device. Here’s a simplified rundown:
- Link one end of the XLR cable to the microphone’s output jack.
- The other end? It goes to your sound interface or mixer’s XLR input.
- If your microphone needs it, flip the phantom power switch on your interface or mixer.
Mounting the Microphone
Mounting your ZaxSound condenser microphone is like choosing the best stage for your performance.
You got options—stands and shock mounts. The choice boils down to the microphone’s weight and size.
And, position matters! Keep the microphone 6-12 inches away from the source of your sound and at a 45-degree angle to avoid unwanted noise.
Setting Up the Pop Filter
The pop filter, a circular mesh screen, reduces those pesky hissing sounds and wind interference. How to install it?
- Attach the pop filter to the microphone stand or your shock mount.
- Keep it 2-3 inches away from the microphone.
- Align the filter to cover the microphone’s diaphragm.
Phantom Power and Audio Interface
Phantom power fuels condenser microphones, and your ZaxSound mic is no exception. To harness this power, an audio interface or mixer is your go-to.
An audio interface is the bridge connecting your microphone to your computer. It offers cool features like… you guessed it!
Phantom power, gain control, and volume control. To roll with an audio interface, here’s the drill:
- Connect your microphone to the XLR input of the audio interface.
- Link the audio interface to your computer using a USB cable.
- Time to power up! Turn the phantom power on.
Adjusting Gain and Volume Levels
Now, you’re at the final stage of setting up your ZaxSound condenser microphone. Adjusting the gain and volume levels is like fine-tuning your audio.
Gain control fine-tunes the microphone’s sensitivity while volume control is your ticket to the perfect output level. Here are some quick tips:
- Begin with the gain control at its lowest setting.
- Test your normal speaking or singing volume.
- Crank up the gain until the audio level hits the sweet spot.
- Play around with the volume control to score the output level you desire.
To learn more about the setup of a Condenser Microphone, check out my article:
How To Plug A Condenser Microphone Into Computer?
How To Connect MXL 990 Condenser Microphone To Computer?
How To Get Condenser Microphone To Work With FL Studio?
Testing and Troubleshooting
All settled with your brand new microphone setup? Great! Let’s roll into the first audio check.
This critical initial run assures that everything’s humming just right and the sound quality is top-notch. So, crank open that recording software and whip up a fresh audio track.
Dare to share a short monologue directly into the mic and record a quick test clip. After letting it play, sit back and lend an ear.
Clear, crisp audio without any room chatter or pesky background din is what we’re aiming for.
Oh, not so perfect on the first run? No sweat! Remember, you’ve got a ZaxSound condenser microphone and troubleshooting it is a walk in the park.
Here’s a quick rundown of some hiccups you might encounter and their fixes:
That constant hum or rustle?
Perhaps your microphone’s straining to hear you above the background noise. Giving it a gentle nudge closer to your mouth might do the trick.
Tweaking the gain on your audio interface or a clever use of noise gate function in your software can do wonders too.
Pesky pops creeping in when you’re stressing the ‘p’ or ‘b’ sounds?
Pop filters to the rescue! Already using one? Try a little rearrangement or keep a sideswipe style of speaking into the mic to dodge those pops.
Your recorded voice barely making a whisper?
Turning up the gain on your audio interface can solve that, or just getting a little more vocal in front of the microphone can work!
Following these troubleshooting techniques ensures you’re closer to that crystal clear audio capture with your ZaxSound condenser microphone. Now isn’t that just music to your ears?
Recording and Monitoring
Alright, let’s chat about recording and monitoring now that your ZaxSound Condic microphone is all set and ready to roll!
Need tips? We’ve got you covered! From choosing the right recording software to monitoring your audio for the best quality possible, we’ve got all the bases covered.
Let’s start with recording software for your ZaxSound Condenser Mic. There’s an ocean of options out there, but three heavy hitters stand tall: Audacity, GarageBand, and Adobe Audition.
These giants of the recording software world all offer straightforward ways to record, fine-tune, and blend your audio. Integrating your ZaxSound Condenser Mic with them? Piece of cake!
Just find the input device option in the program’s settings and select your microphone. Easy-peasy, right?
Onto monitoring your audio. You know, listening back to what you record as you do it?
This little technique is a game-changer to nail the best sound quality. All you need are headphones or speakers to hear your audio as it’s recorded.
And guess what? Most recording software – like the ones we mentioned before – come with a handy monitoring feature, allowing you to hear your masterpiece unfold in real-time as you create it.
Discover essential information about Condenser Microphone in my article:
How To Use MXL 990 Condenser Microphone on a PC
Maintenance and Care
Just got your mic all set up? Bravo! Here’s how you can keep it in tip-top shape so that it serves you well for an extended period.
Basically, the key to prolonging your mic’s usability boils down to three simple guidelines:
Regular Cleaning
Don’t underestimate the role of cleanliness in keeping your ZaxSound condenser microphone in working order.
Swap out harmful cleaning substances, like water or cleaning fluids, for soft-bristled brushes or microfiber cloths.
Why? They’ll protect rather than harm your mic! Just remember that the aim here is to gently clean the mike’s grille and body.
Safe Storage
See that your mic is in safe hands even when it’s not in use. Let me tell you, extreme weather conditions, moisture, and dust are mic-killers.
Try keeping your microphone in a dry and dust-free environment. Steer clear of swinging temperatures or extreme humidity.
Careful Transport
Lastly, consider how you’ll be moving the microphone around. If it needs some journey time, it’s best to keep it in a protective case or bag.
You wouldn’t want it accidentally getting knocked around and damaging its internal parts, would you?
Remember these pointers and trust me, your microphone will continue to produce high-quality recordings for years to come.
Easy to follow, right? It’s taking good care of your tools that pays off in the long run.
Frequently Asked Questions
Can I use condenser mic without sound card?
Well, unfortunately, you can’t. A sound card is key here because it converts the microphone’s analog signal into a digital one that your computer can understand.
Can I connect a condenser mic directly to a speaker?
Nope, that’s not going to work either. A microphone’s signal needs a bit of a boost and some processing before it can be played through a speaker.
Do condenser mics pick up background noise?
Indeed, it does! Condenser mics are sensitive little things and they do pick up background noise.
They’re designed to hear a wide range of frequencies, some of which include those pesky ambient noises.
Do condenser mics have self-noise?
Yep, every microphone has what’s known as self-noise, including condenser mics.
It’s the noise made by the microphone’s electronics, and you’ll hear it when the mic is on, but not picking up any sound.
Why is my condenser mic so quiet?
Well, there could be a few culprits behind a quiet condenser mic, like low phantom power, incorrect gain settings, or a faulty cable.
It’s worth checking the mic’s manual and settings to troubleshoot the issue.
Are condenser mics good for vocals?
Absolutely! Condenser mics are renowned for their sensitivity and their ability to capture all sorts of frequencies.
That’s why you’ll often find them in recording studios, front and center for vocal recording.
Can you use condenser mic without preamp?
No can do, friend! A preamp is critical because it turbocharges the mic’s signal to a level that your computer or recording device can process.
Do condenser mics need amplifier?
Yes, sir! To process their signals on a computer or recording device, condenser mics need an amplifier. This could come from a preamp or an audio interface.
Why do streamers use condenser mics?
It’s all about clarity and frequency range! Streamers love condenser mics because of their sensitivity and their ability to pick up a wide spectrum of frequencies.
These make them fantastic for voice recording. No wonder you’ll find them in many recording studios!
Is A condenser mic good for gaming?
You bet! A condenser mic can be great for gaming, thanks to its sensitivity and broad frequency capture. This helps your fellow players hear your voice with perfect clarity.
Can you use a condenser mic as a room mic?
Yes, you sure can! A condenser mic can record the ambient sound in a room for a recording or streaming setup.
But remember, location and settings matter! Ensure you position your mic correctly and adjust its gain settings to keep unwanted noise at bay.
Final Thoughts
Setting up the ZaxSound Condenser Microphone is a breeze, enhancing your audio game significantly.
Ensuring a quiet environment and proper cable connections is vital for optimal performance. Adjusting settings to suit your recording needs is key. Remember to test and fine-tune to achieve pristine sound quality.
This microphone offers a cost-effective solution for amateur and professional audio enthusiasts alike. Unleash your creativity with ease and clarity.